strawberry tartlets

Sadly, strawberry season is over in these parts, though fortunately I picked enough strawberries a few weekends ago that I will have plenty to bake with in the coming months.  Thank goodness for freezers!

strawberries

Months ago I purchase some adorable little tartlet pans but had not yet used them for anything so I decided to amend the situation this past weekend.  I also have been meaning to experiment more with gluten-free baking since it intrigues me and I have many gluten-free flours in my pantry, so when I found a pate sucre (sweet crust) recipe from my La Tartine Gourmande cookbook I was inspired to marry it with some freshly picked strawberries in said tartlet pans.

6.30.13 073

 The recipe called for sweet white rice flour which I have plenty of but also quinoa flour which I did not have.  I found it in a local health food store but it was crazy expensive but since I always have actual quinoa in my pantry I decided to go DIY and grind it into flour myself.  Many websites advised toasting the quinoa before grinding it into flour I ignored that and just ground it down using my coffee grinder.  I was a bit nervous how it would turn out because quinoa can sometimes be a little bitter but in this particular recipe there was enough else going on (namely confectioners’ sugar) that it turned out fine.  Next time I may try to toast the quinoa before grinding, however, and I will let you know if it’s worth it or not.

6.30.13 078

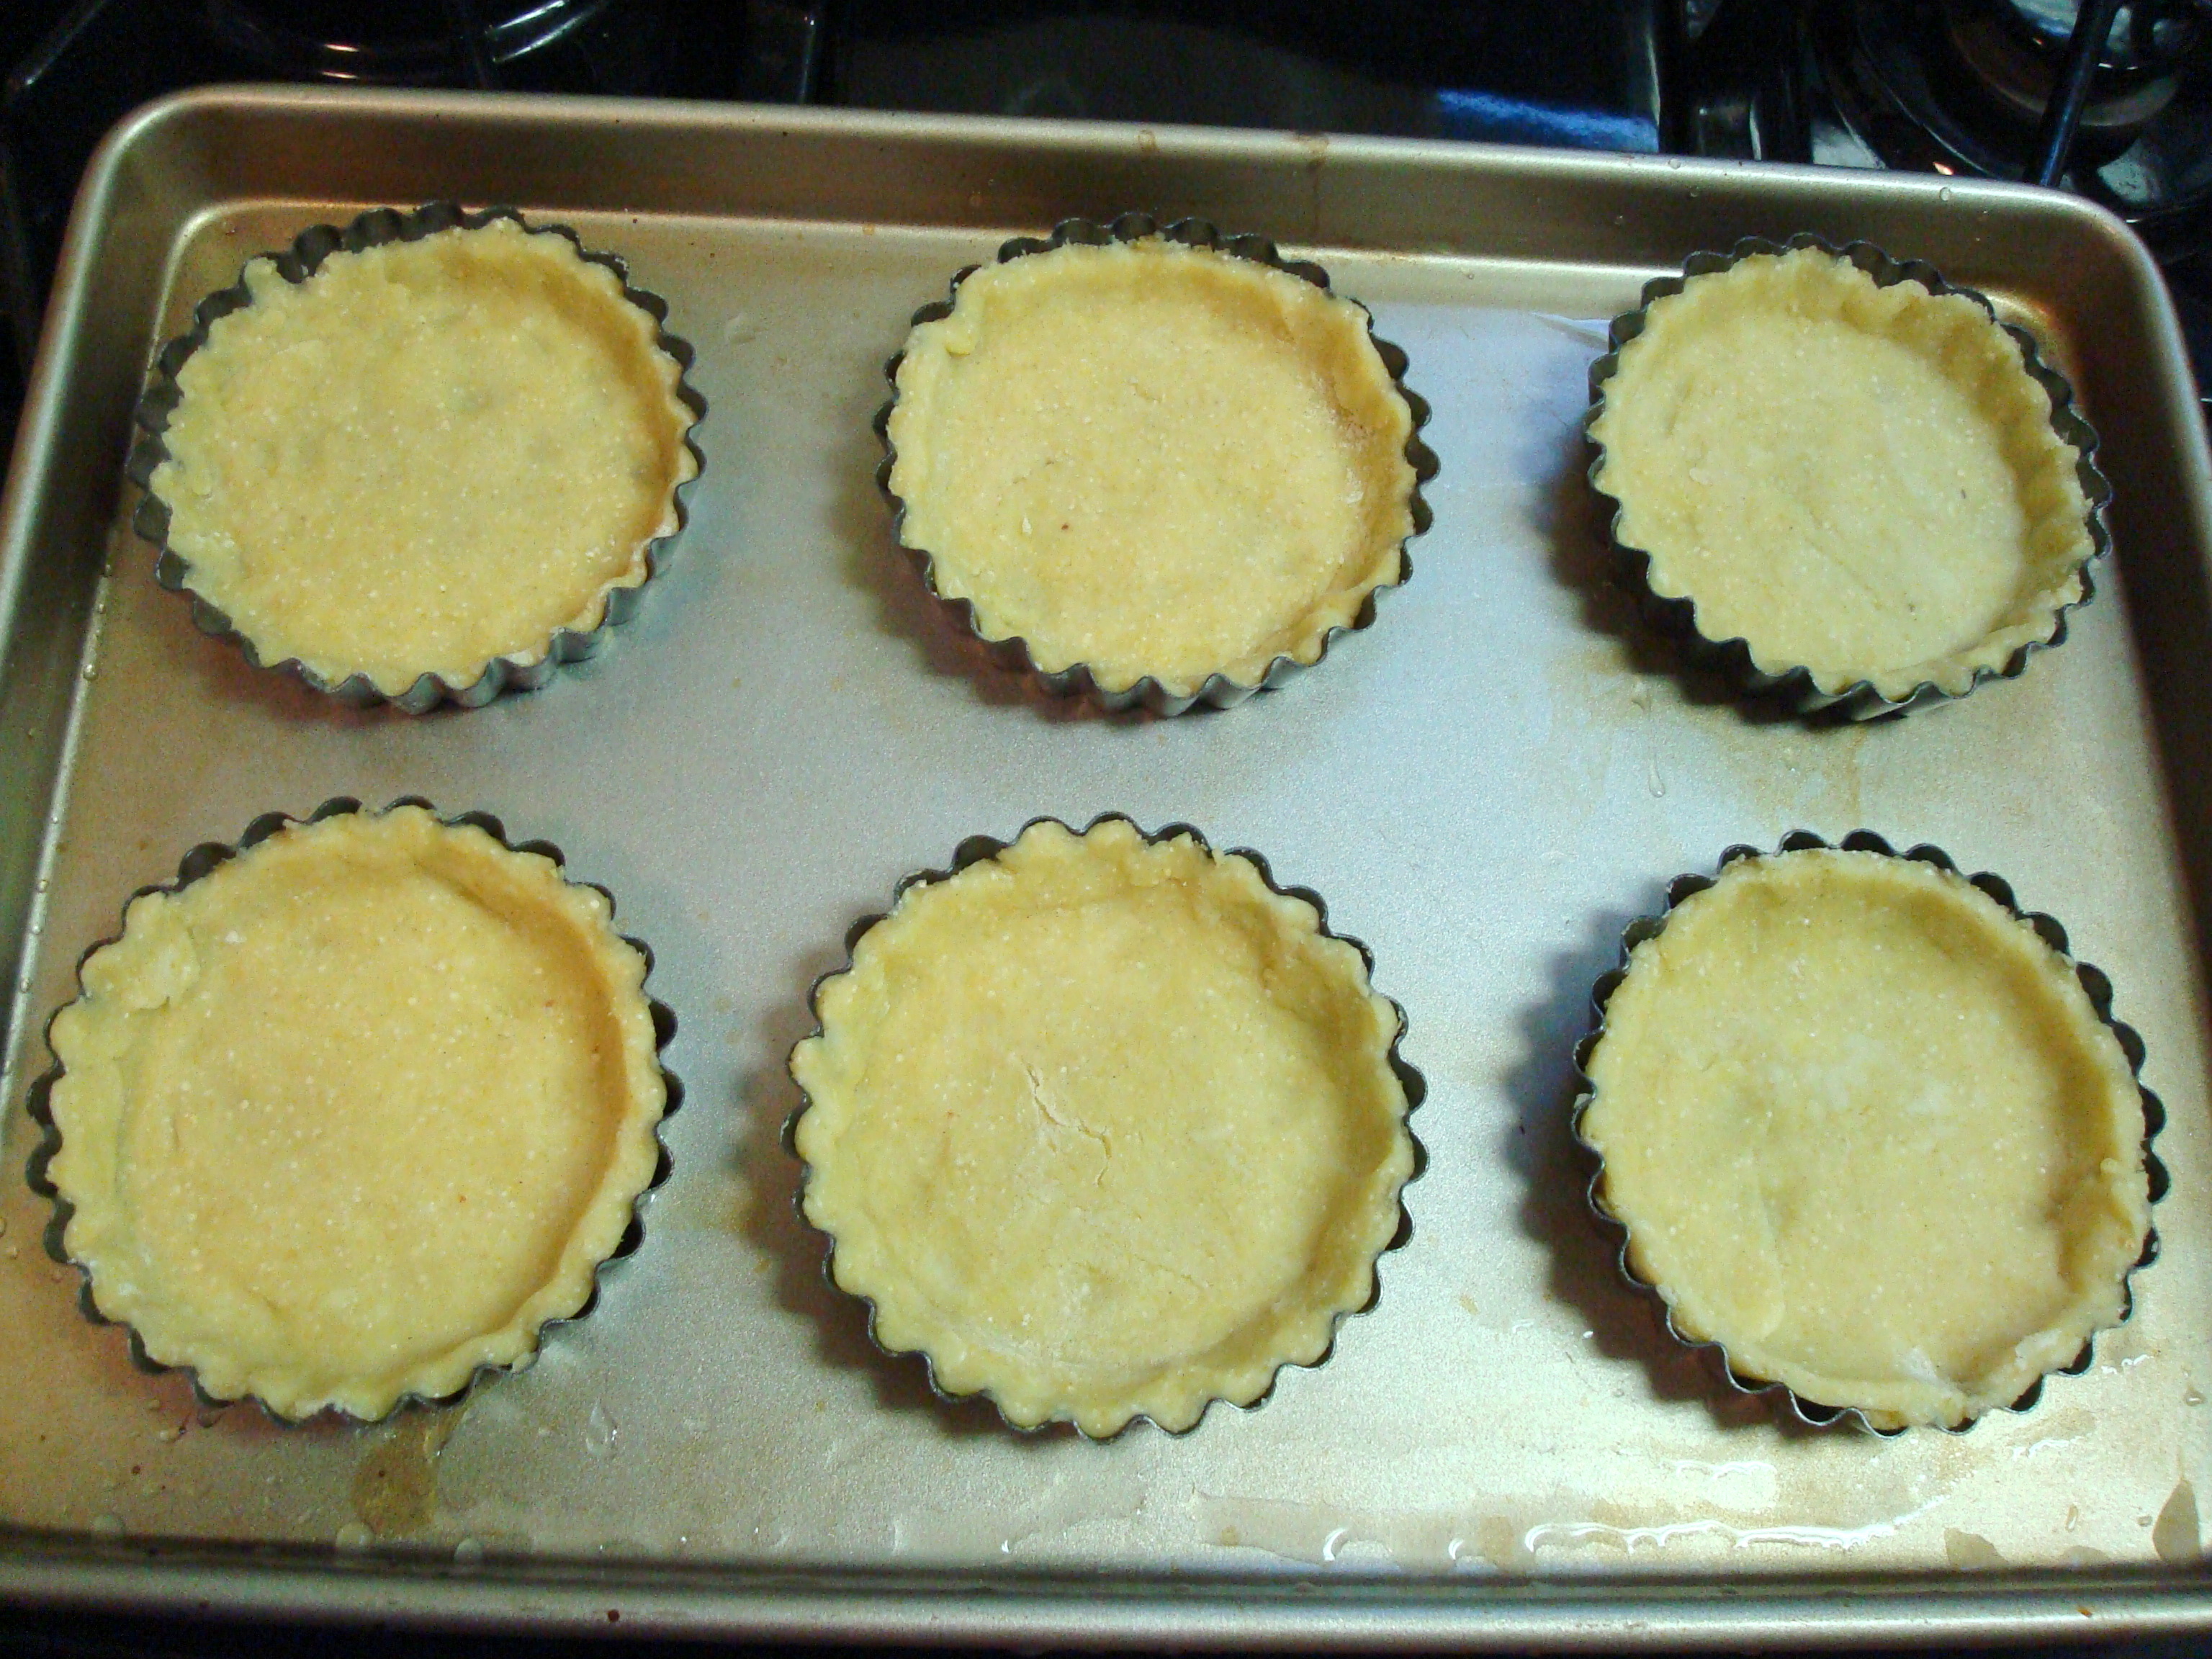
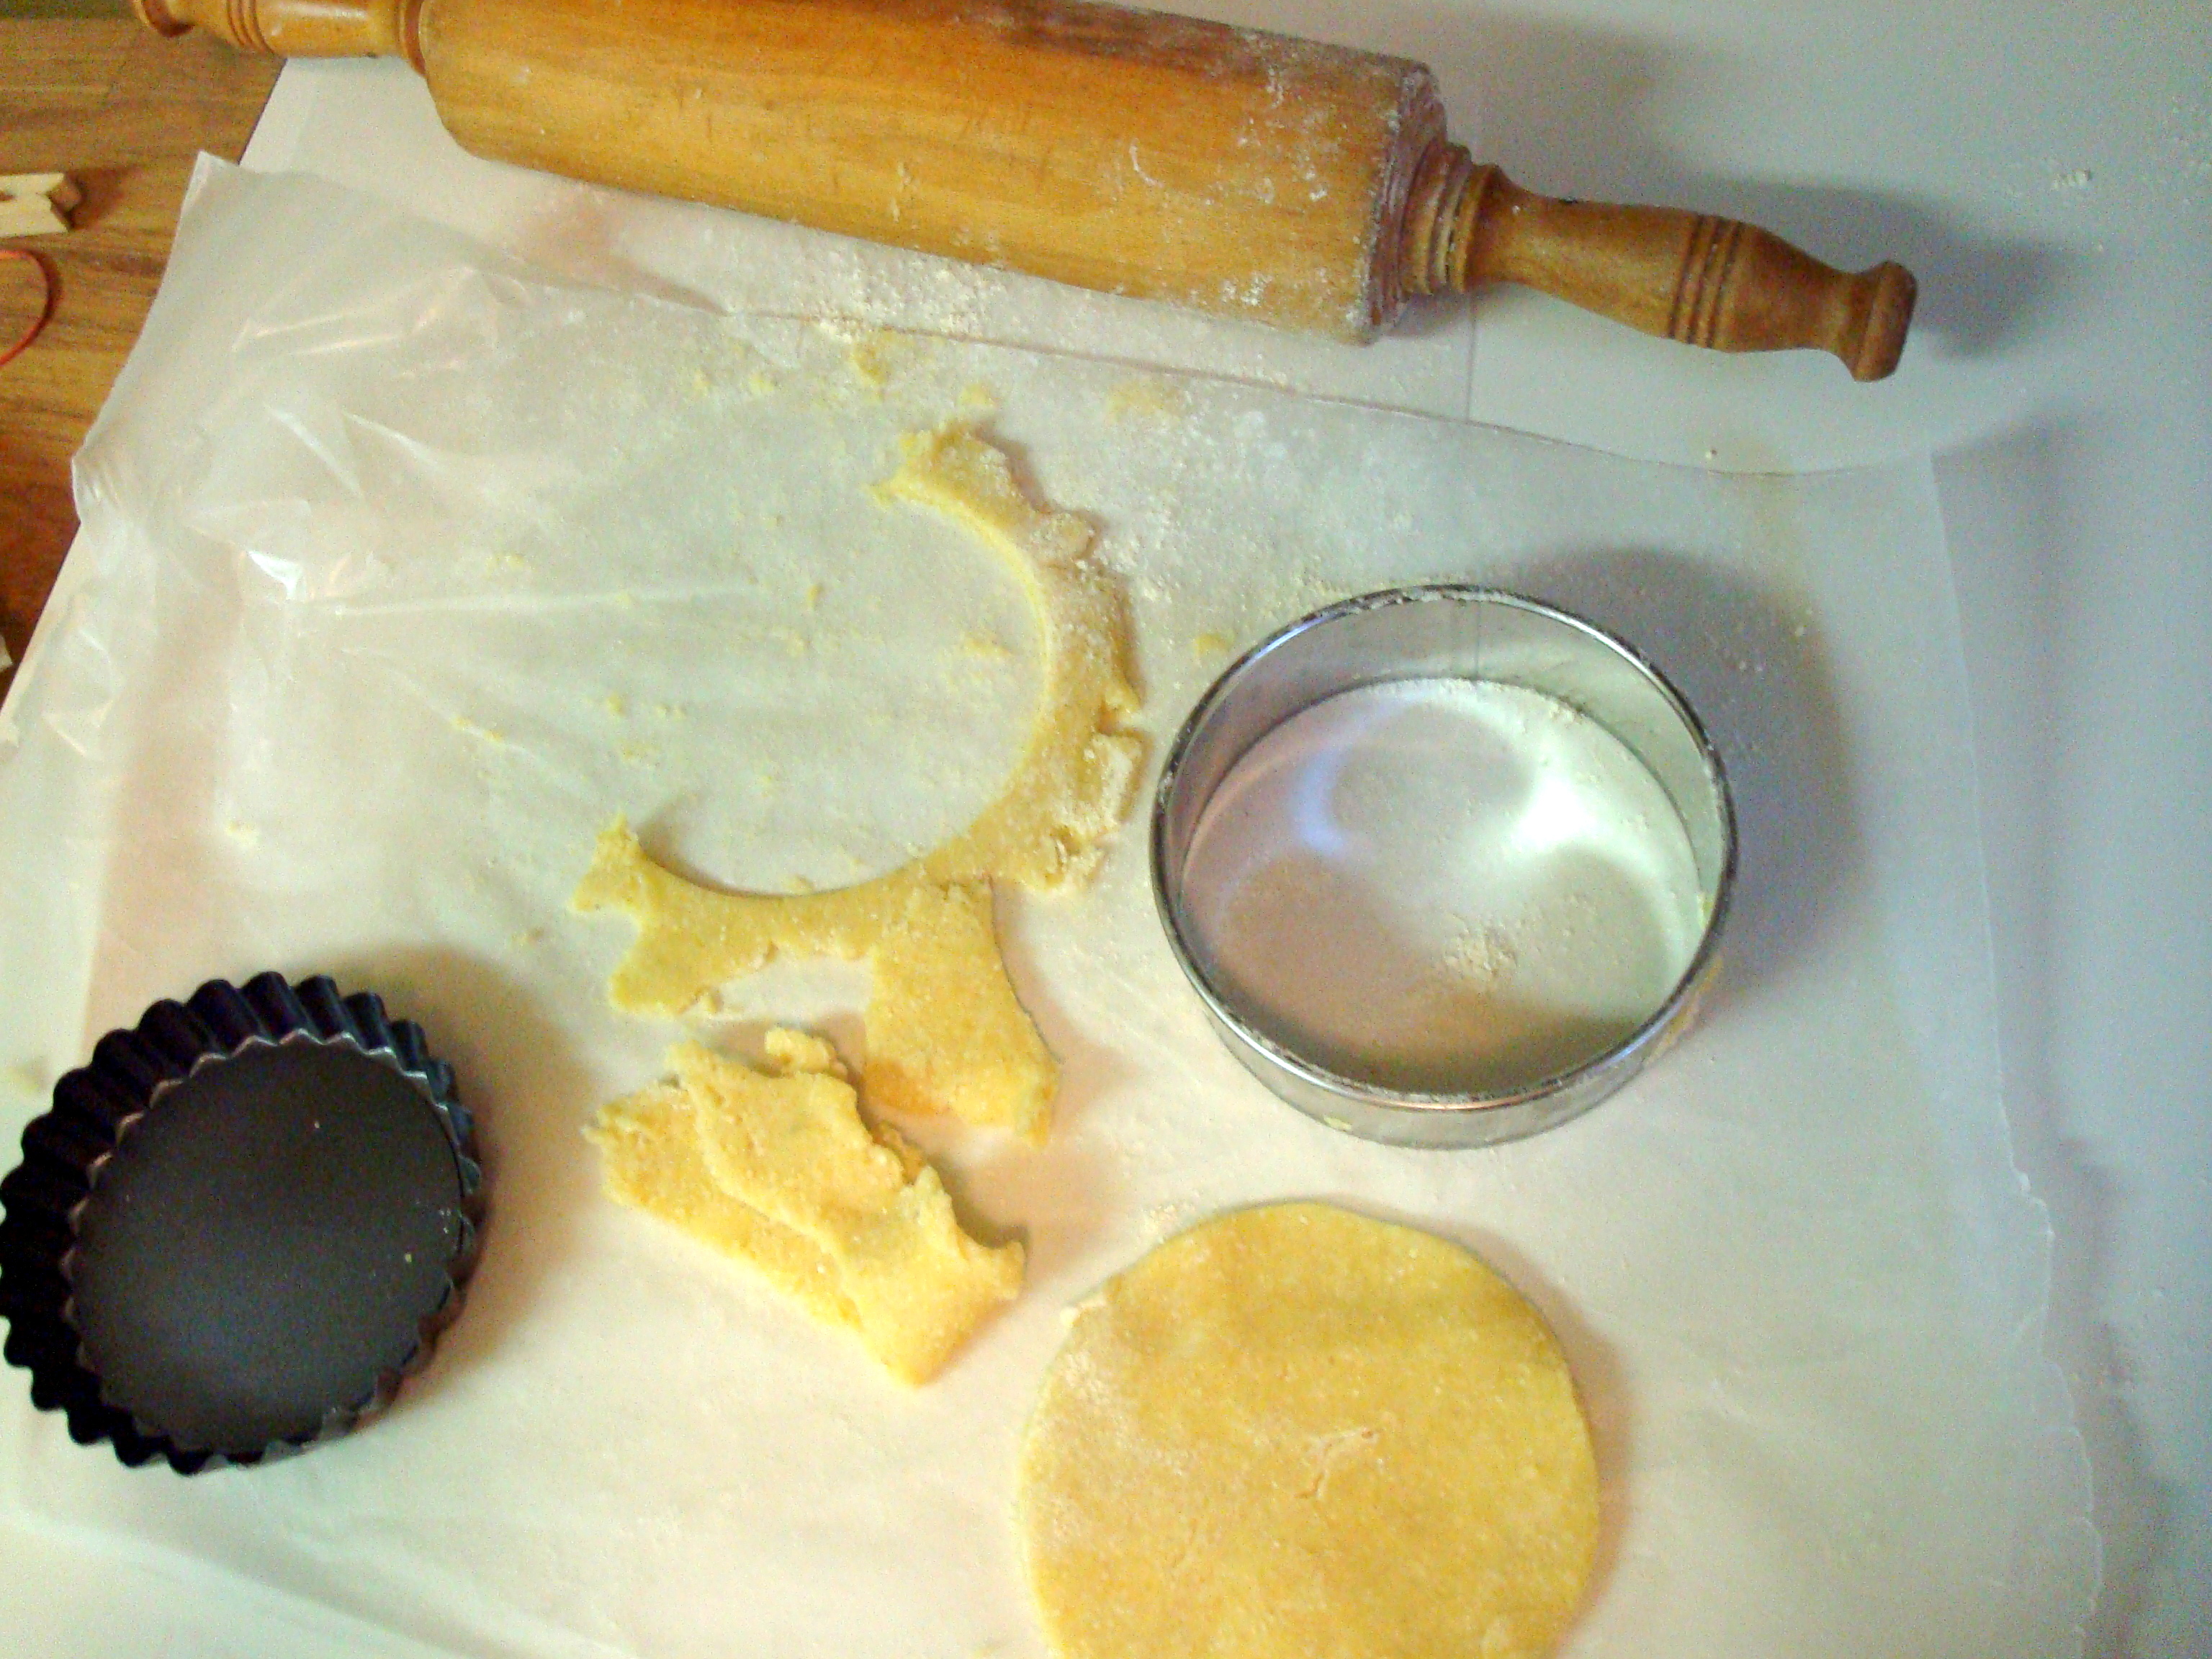
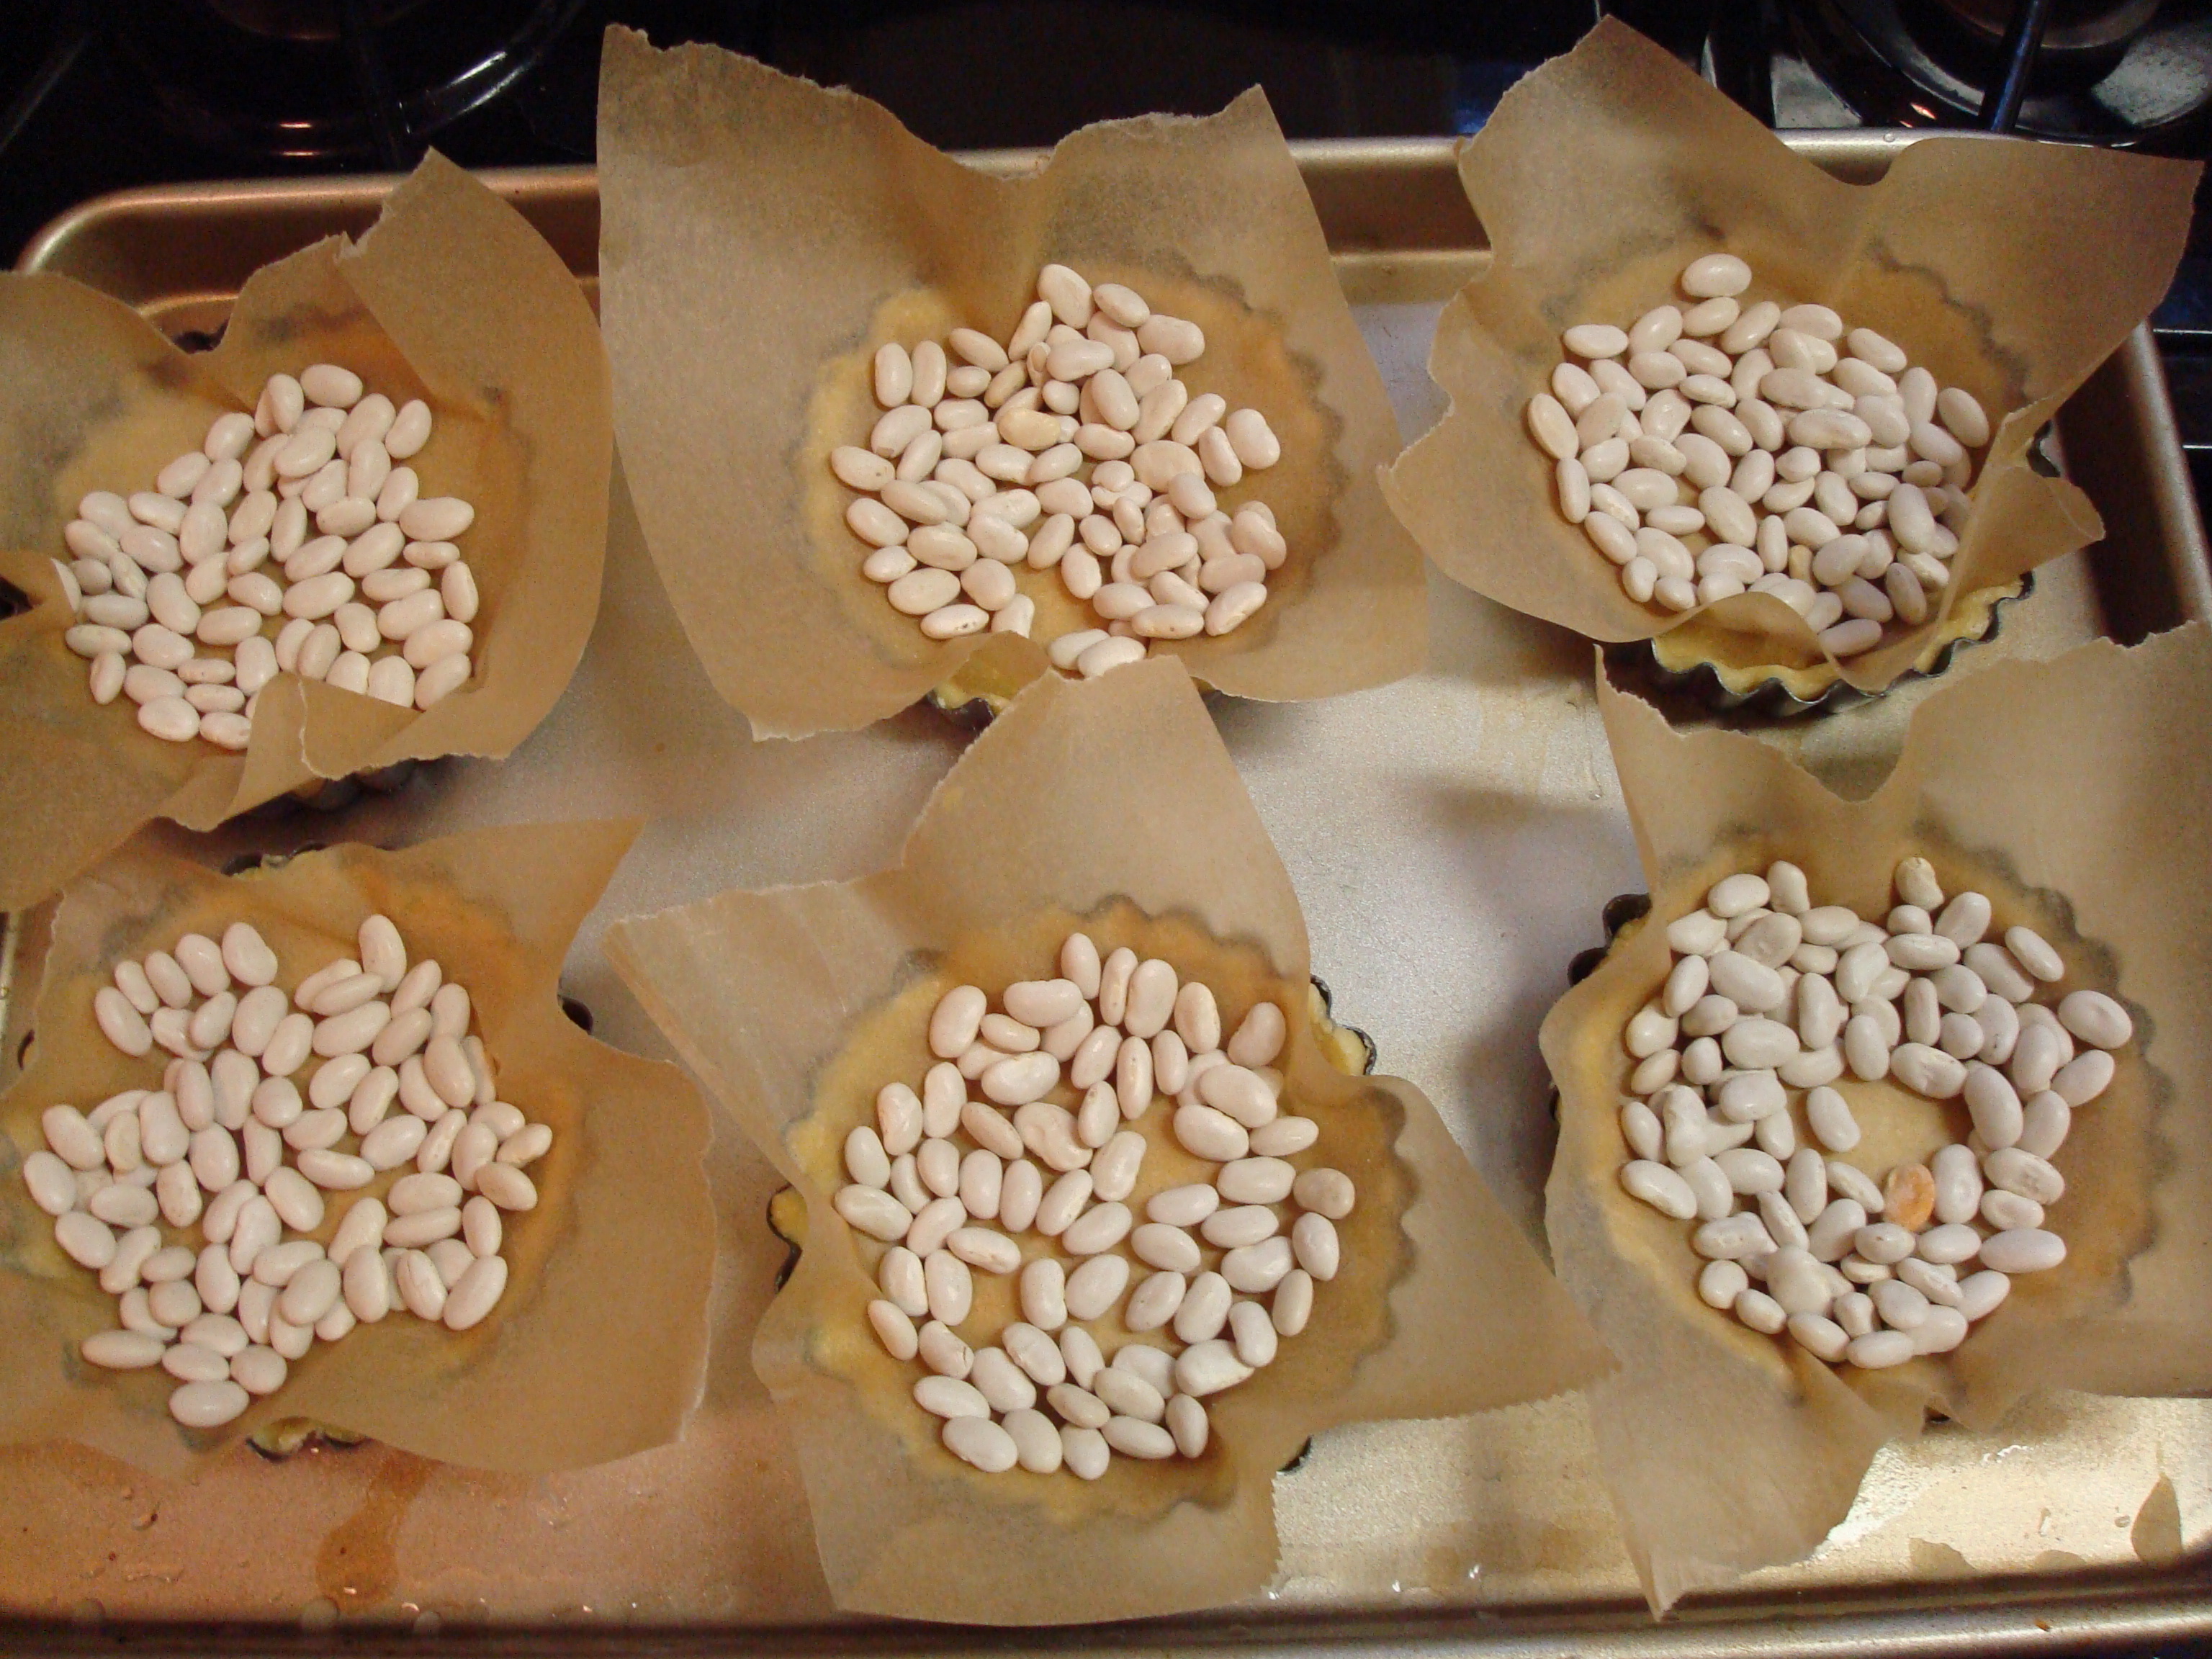
This dough had to be refrigerated for a few hours and then brought to room temperature before being rolled out.  Upon rolling the dough out I used a biscuit cutter to get it into shapes that fit neatly into the tartlet pans but neatness is definitely not required here.  You could pat the dough into the pans in any manner you choose and it will still turn out fine, I was just being fancy.  I pre-baked the tartlet crusts so put parchment paper into each tartlet pan and then weighted that with dried beans.  Apparently you can buy pie weights but I don’t see the point since dried beans or rice work just as well and I always have them on hand.  (Save them and use them as intended, just let them cool after their stint as pie weights and put them back with the rest of the beans or rice.)

6.30.13 080

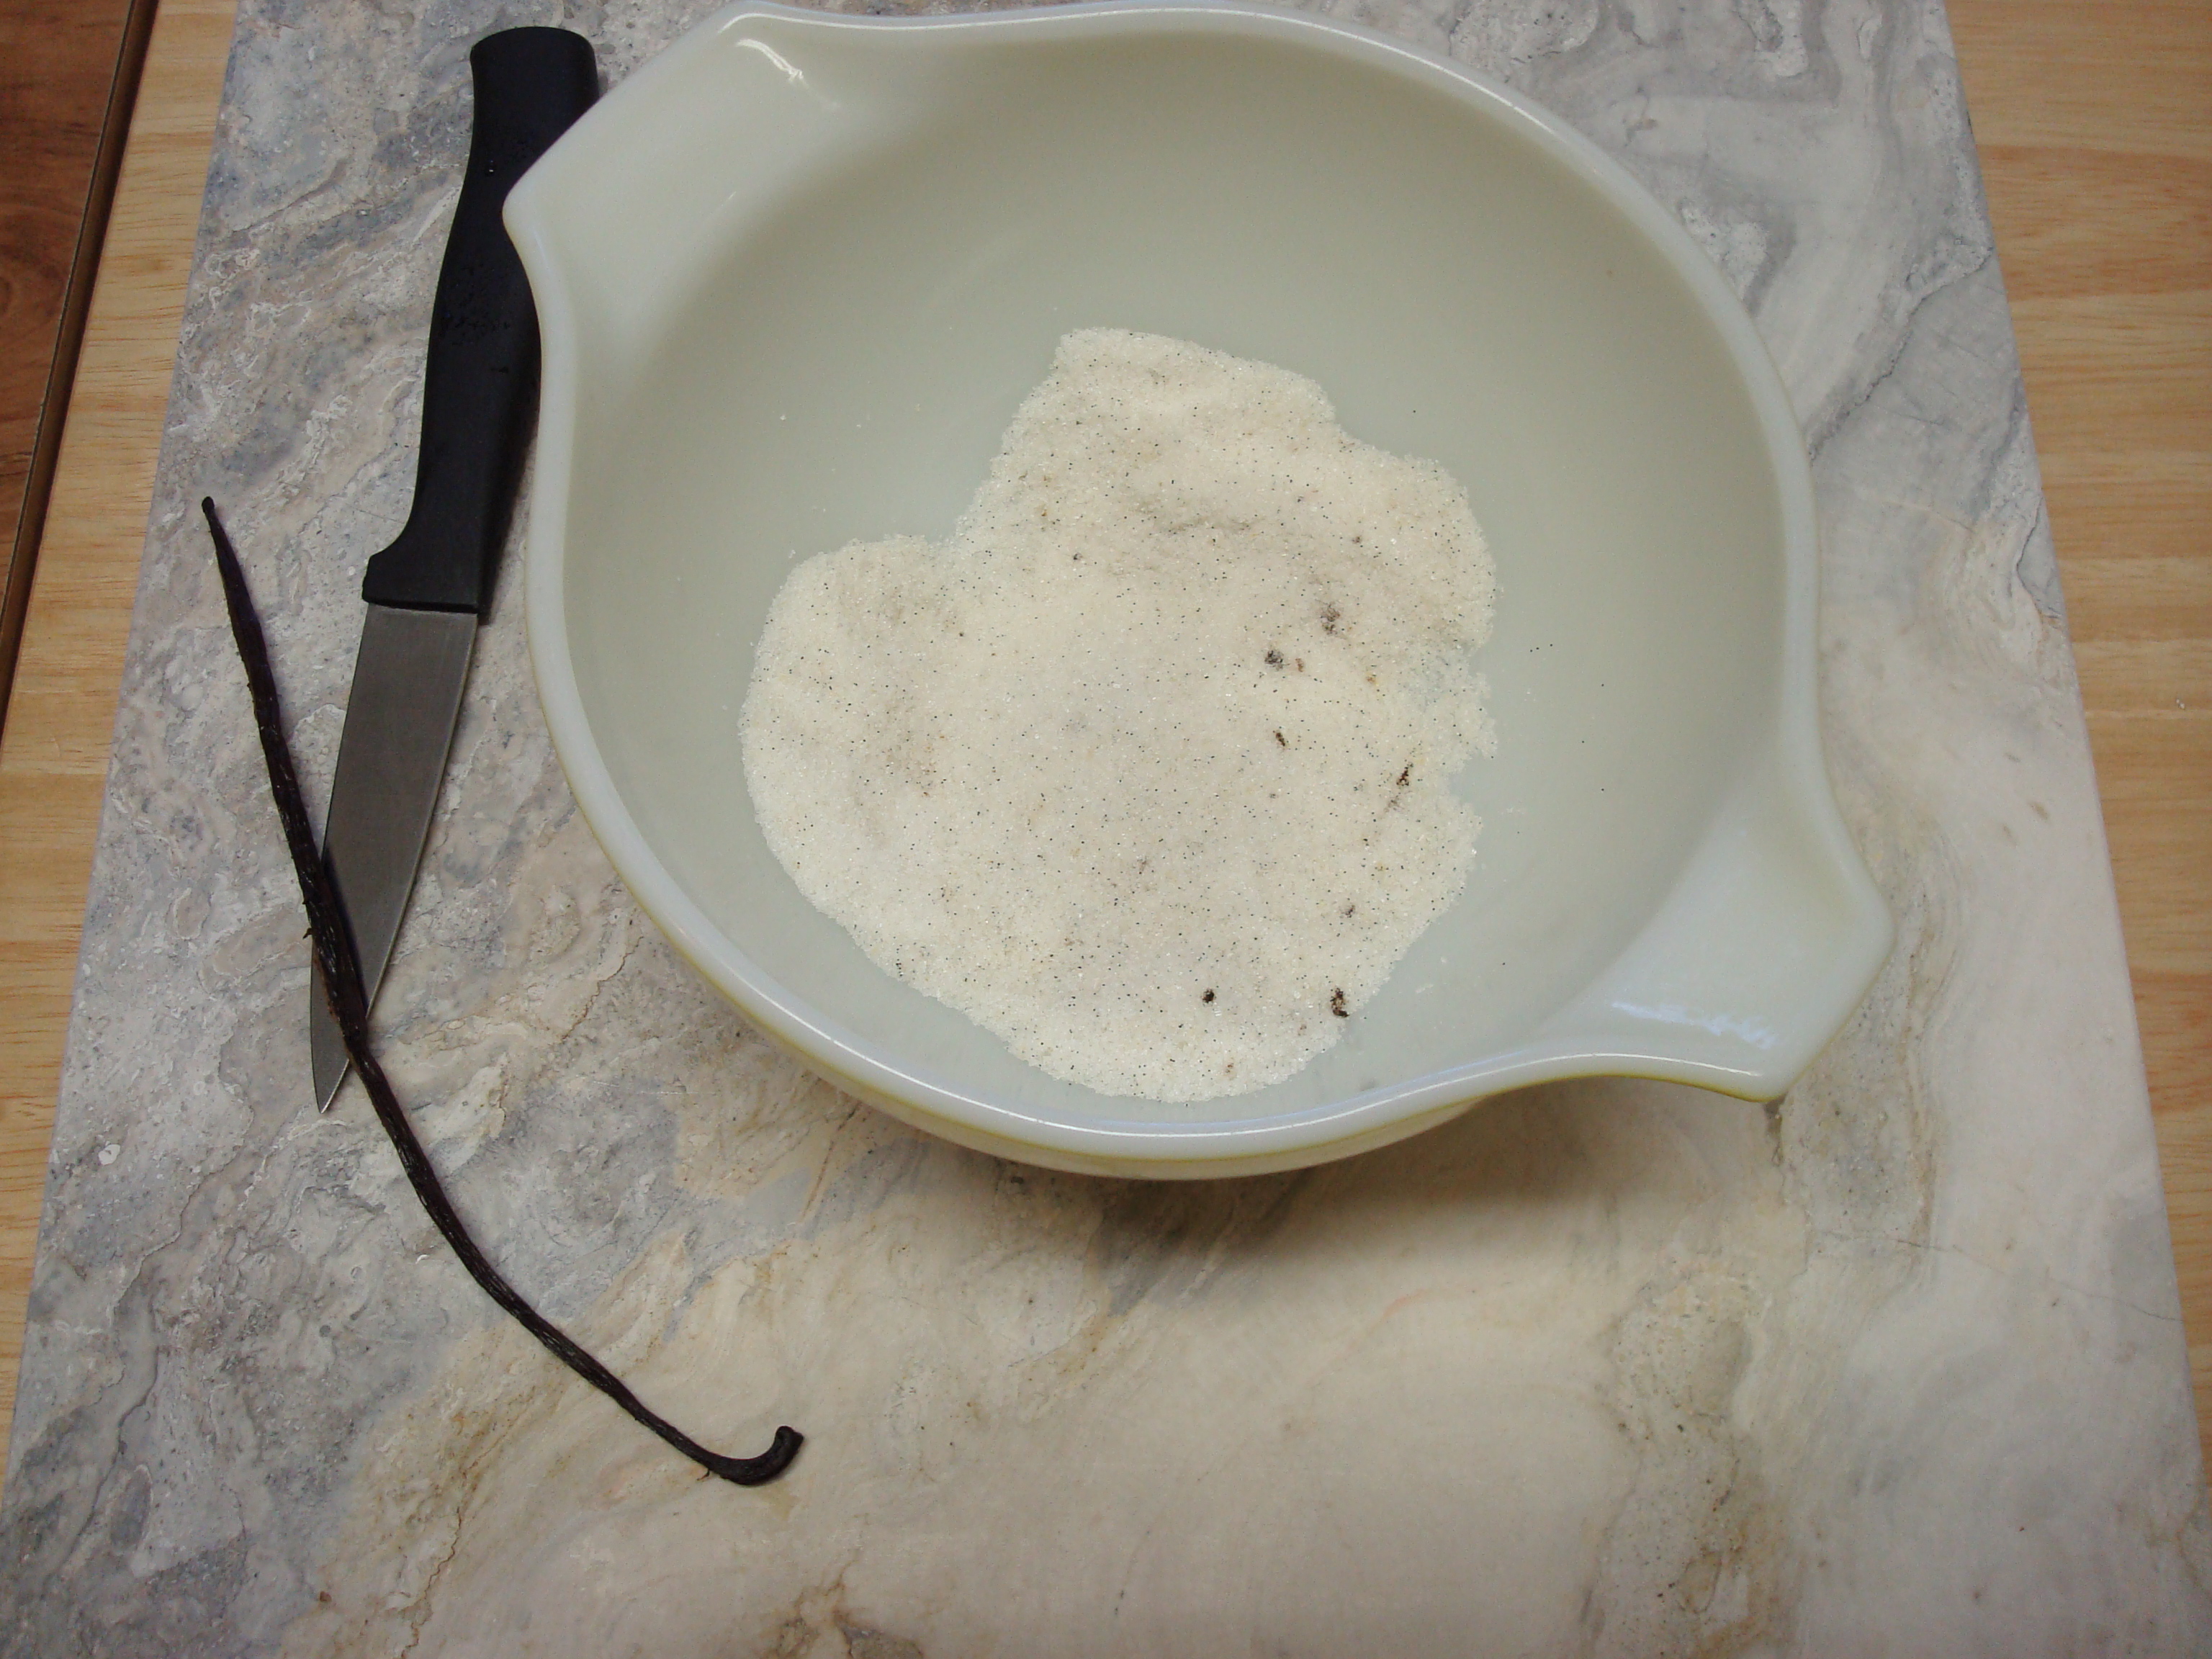
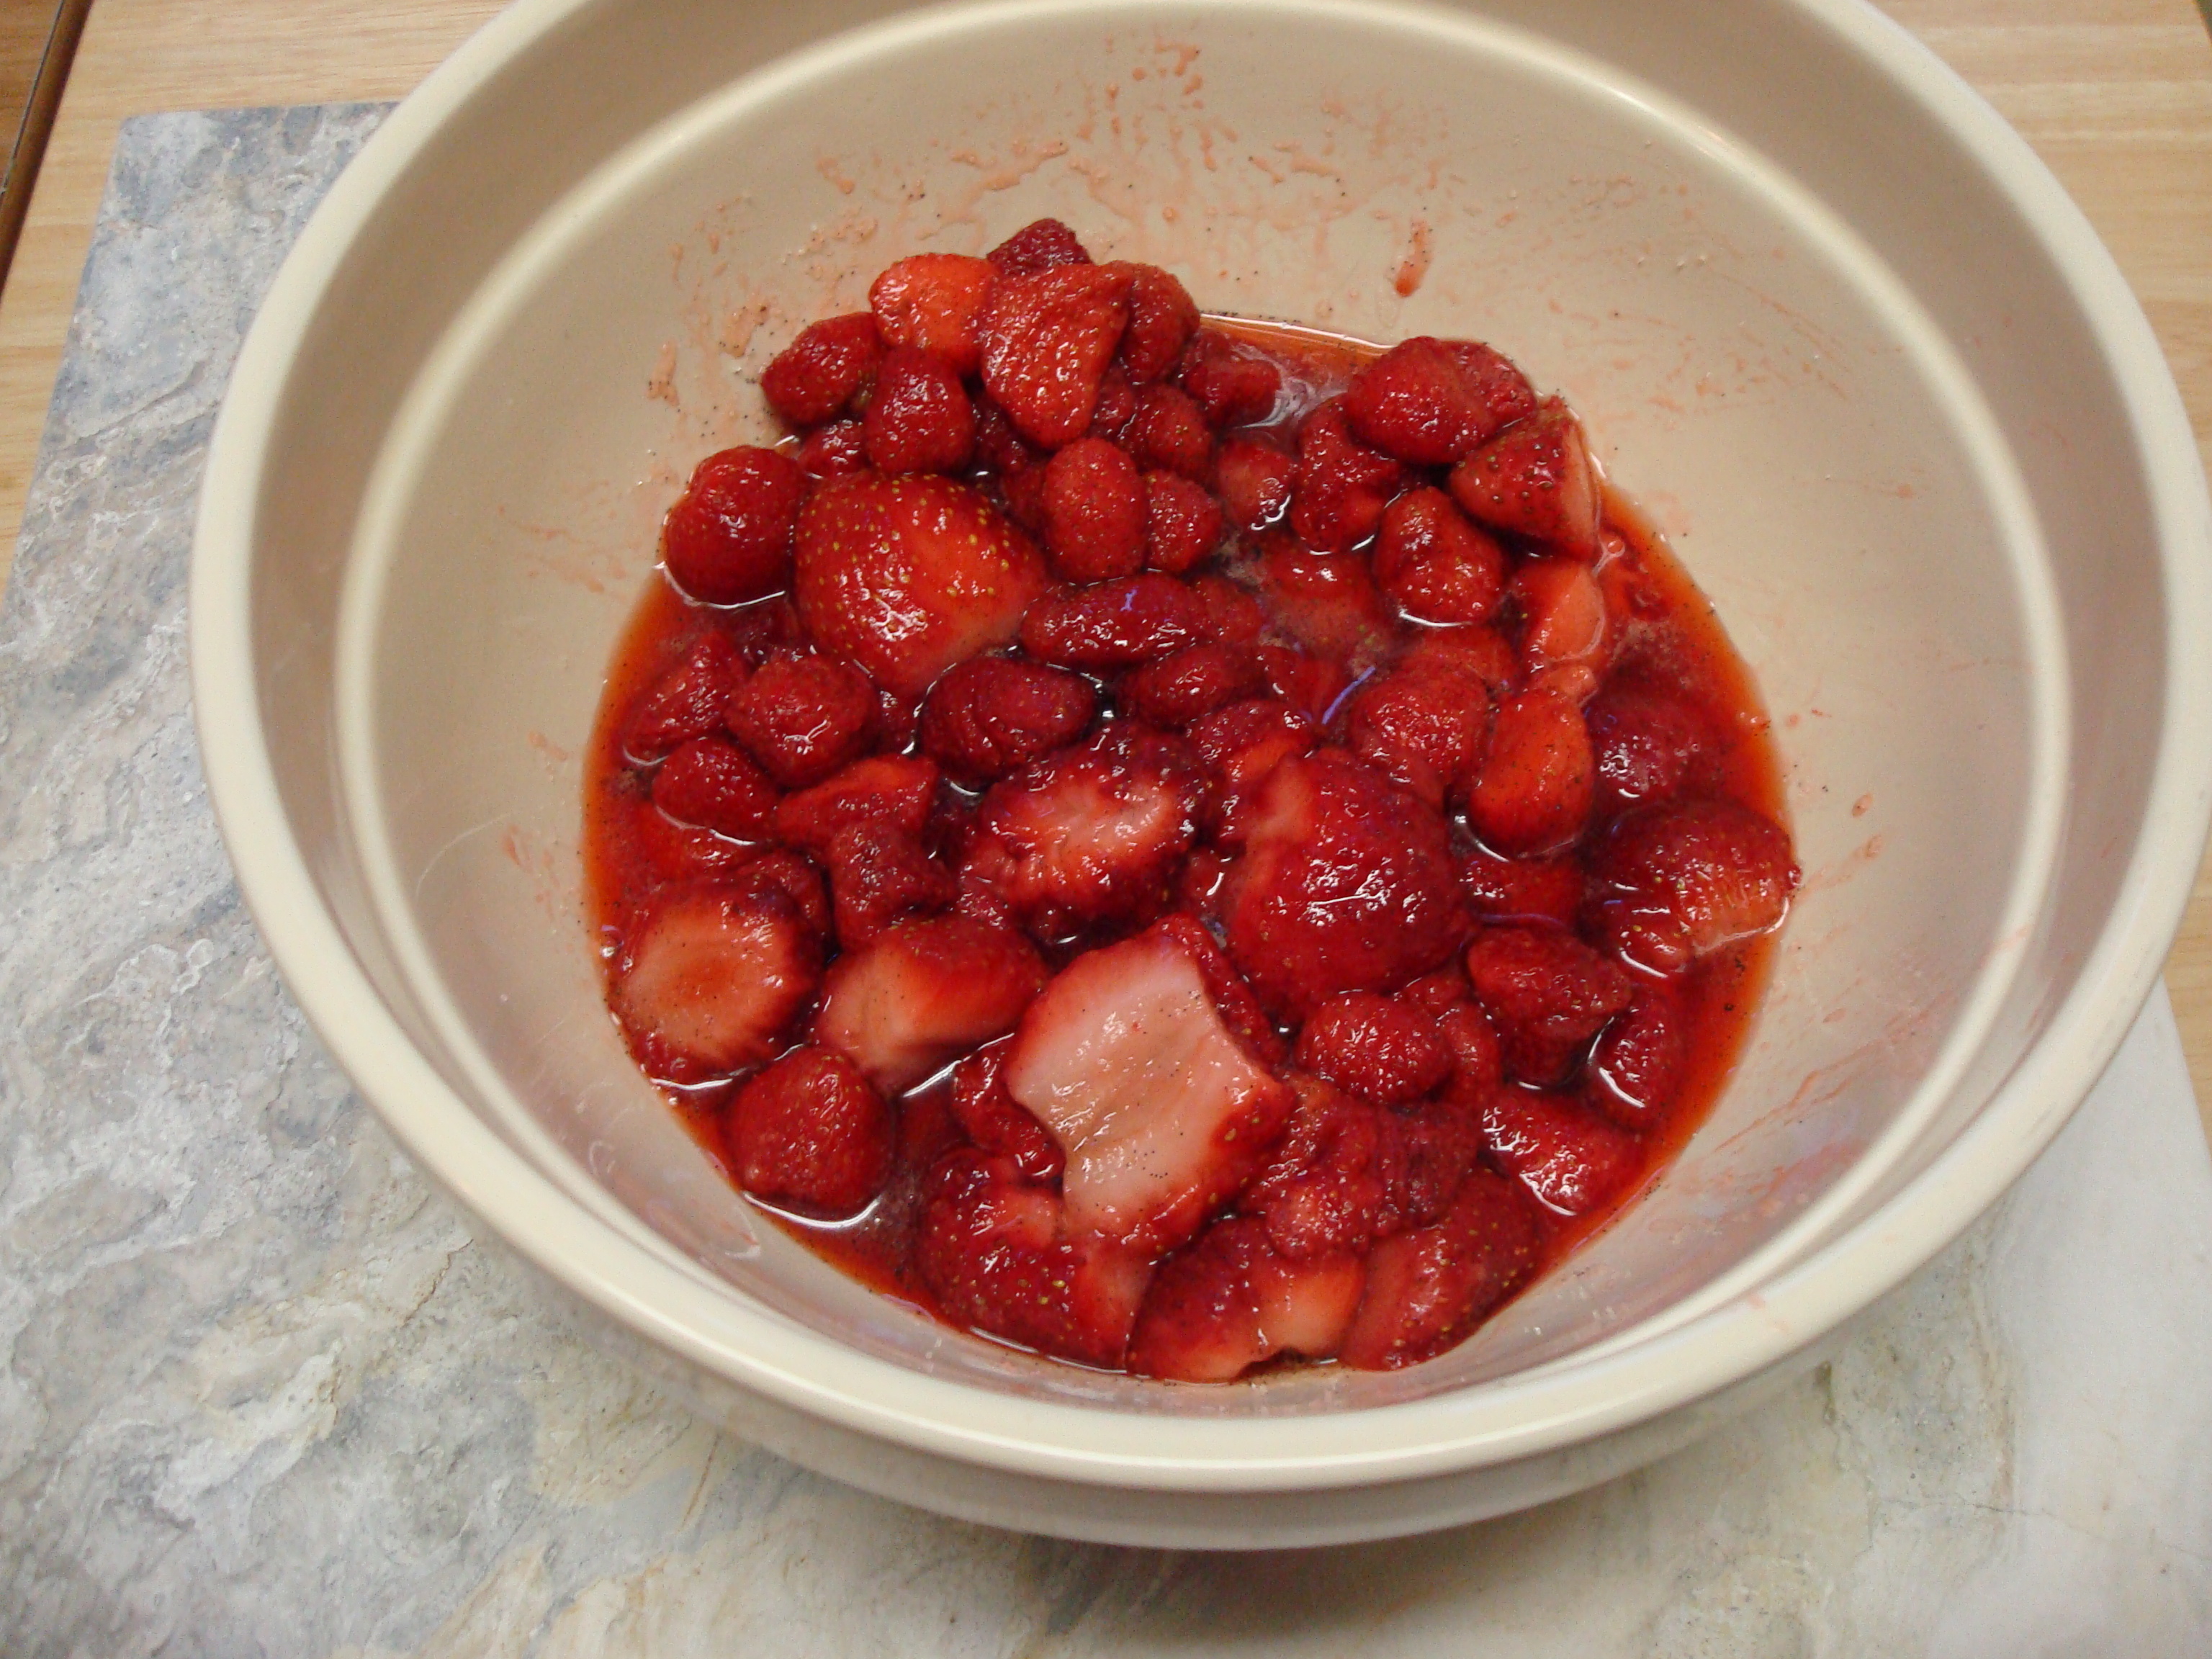
I did research for the strawberry filling but wound up shooting from the hip since a lot of what I was finding seemed more complicated than it needed to be.  I wanted to keep it simple with strawberries as the main star.  The one (simple but) slightly fancy thing I did was to use the seeds from half of a vanilla bean pod to scent/flavor the sugar I used to macerate the strawberries.  It’s so easy to do but makes the dish more luxurious.

6.30.13 069

Sprinkle the vanilla-infused sugar on top of sliced strawberries and let the berries macerate for about an hour.

6.30.13 083

Then pour the berries into the pre-baked tartlet shells and bake for about 10 to 15 minutes more in the oven to let the strawberries roast a little bit.

6.30.13 084

The tartlets are best served warm from the oven, and if you wanted to serve them with a little ice cream, whipped cream, or even a dollop of mascarpone cheese I would say that you and I should be friends.

6.30.13 097

Strawberry Tartlets

Pate Sucre (Sweet Crust) (from “La Tartine Gourmande: Recipes for an Inspired Life” by Beatrice Peltre)

  • ½ cup white rice flour
  • 1/3 cup quinoa flour
  • 1/3 cup cornstarch
  • 1 ½ teaspoons xanthan gum
  • 1/3 cup confectioners’ sugar
  • 7 tablespoons unsalted butter, chilled and diced
  • 1 small egg

In the bowl of a stand mixer fitted with the paddle blade, combine the flours, cornstarch, xanthan gum, and confectioners’ sugar.  Work on medium speed to obtain a fine mixture.  Add the butter and work again until crumbles form.  Add the egg and work until the dough detaches from the bowl and forms a ball.  Wrap in plastic wrap and refrigerate for a minimum of 3 hours.  Bring to room temperature before using (about 30 minutes, when the crust doesn’t feel hard).

Using gluten-free dough, generously dust work surface and rolling pin.  Roll out room-temperature dough to circle slightly larger than 10-inch tart pan.  If you are using tartlet pans as I did, the shape of the rolled-out dough doesn’t matter so much as you will be fitting it into smaller pans.  I used a floured biscuit cutter to portion out dough for the tartlet pans but use whatever method you feel is best.

Preheat oven to 350 degrees F.  Once you have rolled out the dough and pressed it into the tart mold(s), cover it with a piece of parchment paper, and top it with pie weights (dry rice or beans work too).  Bake the crust for 10 or 15 minutes, until light brown.

Strawberry Filling:

  • 3 cups washed, hulled, and sliced strawberries
  • 3 tablespoons sugar
  • ½ vanilla bean pod

Slice vanilla bean pod in half and set half away for use at a later time.  Scrape the seeds out of the half you are using into a small bowl.  Pour sugar into the same bowl and use clean fingers to rub the vanilla seeds into the sugar.

Place sliced strawberries into medium-sized bowl.  Sprinkle vanilla sugar mixture over the top and let berries macerate for about an hour.

After berries have macerated, pour into pre-baked tart shells and bake for an additional 10 to 15 minutes in preheated 350 degree F oven.  Enjoy tartlets warm with a dollop of ice cream, whip cream, or mascarpone cheese.

zucchini brownies, gluten-free and almost vegan

A coworker of mine has been very generous with sharing her garden with me this summer and lately she has had an abundance of zucchini.  Apart from zucchini bread I have only ever had zucchini in savory dishes so when she mentioned to me that she had recently eaten a delicious brownie made with zucchini I was intrigued and did a little interweb research.  The best-looking recipe I came across also happened to be gluten-free and refined-sugar-free.  What?!  Since I have been getting myself out of bed at 5 in the morning three days a week lately for a bootcamp class both of these things appealed to me so as not to undo all the good I’ve been doing.

Now, normally “healthy” and “baked goods” are not words that should be used together in a phrase but in this case it works.  And the brownies were so easy to make!  Four simple steps.  Anyone can handle that!

In place of sugar the recipe called for raw honey and instead of flour there was almond butter.  I happen to love almond butter and generally keep it in stock when I want a break from peanut butter so already had some on hand.

The results were moist brownies with a hint of cinnamon and nutmeg.  If you want a rich, dense, chocolate-y brownie, look elsewhere, but if you want a sweet treat that actually isn’t that bad for you health-wise, this is your dish.  I think it may inspire me to sneak vegetables into sweet baked goods again…

Flourless Zucchini Brownies (recipe found at http://fastpaleo.com/zucchini-brownies/)

  • 1 cup of almond butter
  • 1 1/2 cup of grated or chopped zucchini (I used food processor)
  • 1/3 cup of raw honey
  • 1 egg
  • 1 tsp of vanilla
  • 1 tsp of baking soda
  • 1 tsp of cinnamon
  • 1/2 tsp of nutmeg
  • 1 cup of dark chocolate chips

Preheat oven to 350 degrees.

Combine all the ingredients into a large bowl and mix everything together.

Pour into a greased 9×9 baking pan.

Bake for 35-45 minutes, or until a toothpick comes out clean.

a dish that will keep the vampires at bay

After discovering last year that I love kale I wanted to find another way to prepare it because even though I could eat kale chips until the cows come home I thought it might be nice to diversify my kale repertoire.

This preparation is equally as simple and slightly more flavorful with the addition of not one, but two different cuts of garlic (sliced and minced) and red pepper flakes.  You can go crazy with the garlic– the recipe suggests 5 to 6 cloves, it just depends on what your plans for the rest of the evening are.  You for sure will be breathing it all night if you go full on with the garlic but on the bright side you will be warding off colds and vampires in equal measure.  Not bad things to do.

The kale is so tender and well-flavored that I could eat a giant bowl of it, and in fact did.  It makes a great side along with fish or pork or chicken or really any old thing you want to pair it with.  Yeah kale!

Kale with Double Garlic (from “How to Cook Everything” by Mark Bittman)

  • 1 pound kale, collards, or broccoli raab, with stems under ¼” thick, well washed
  • ¼ cup olive oil
  • ¼ cup thinly sliced garlic, about 5 or 6 cloves, plus 1 teaspoon minced garlic, or more to taste
  • ½ teaspoon crushed red pepper flakes, or to taste
  • Salt and freshly ground black pepper to taste
  • ½ cup chicken, beef, or vegetable stock, or water
  • Lemon wedges

Coarsely chop the stems and leaves of the kale.

Place the olive oil in a large, deep saucepan.  Add the sliced garlic, pepper flakes, salt, and black pepper and cook over medium-high heat for about 1 minute.

Add the kale and the stock or water.  Cover and cook over medium-high heat for approximately 5 minutes, or until the greens are wilted and just tender but still a little firm.

Uncover the greens and continue to cook, stirring, over medium-high heat, until the liquid has all but evaporated and the greens are quite tender.  Taste for seasoning and add red or black pepper and salt as needed; add the remaining minced garlic, cook for 1 minute more, and serve, with lemon wedges.

Cinco de Mayo fish tacos for you

Yesterday I felt like I discovered a new world.  I knew I wanted to make fish tacos for Cinco de Mayo and needed to stop at a Mexican grocery store to pick up a few of the ingredients, namely “crema,” which is Mexican sour cream.  (It’s like traditional sour cream except it’s a little thinner and has more salt.)  I popped into a little Mexican mercado I had passed before and in the back of the store which was otherwise like any other small grocery store there was a team of people making fresh corn tortillas and serving up a variety of meats.  It smelled amazing.  You had the option to buy the tortillas and meats by the pound to take away or you could order food to stay and eat in.  Yes please!  So for lunch I had tacos carnitas y barbacoa with a tamarind soda for less than $5.  Gotta love that.  But I digress.

Last week a coworker passed me the following recipe for Baja Fish Tacos saying she thought I might like them, and boy was she right!  Don’t let the length of the recipe intimidate you– it was so simple and fast to prepare.  There are several components: the sour cream, the pico de gallo, the slaw, and of course the fish itself, and you could skip any of the first three, but I don’t recommend it.  The pico is a little spicy, the slaw a little sweet, and the crema the perfect salty cooling balance.  The recipe calls for mahi-mahi but you can use any flakey white fish.  I used tilapia based on my coworker’s suggestion and it was great (and less than half the price of mahi-mahi.)

And make sure to enjoy with a cerveza!

Baja Fish Tacos (adapted slightly from recipe found at www.epicurious.com)

  • 1 pound mahi-mahi, cod, tilapia or other white flakey fish (I used tilapia)
  • ¼ cup vegetable oil
  • 1 ½ tablespoons lime juice
  • 2 ½ teaspoons chili powder
  • ¾ teaspoon ground cumin
  • ¾ teaspoon ground coriander
  • ¾ teaspoon minced garlic
  • Salt, to taste
  • 8 corn tortillas, 6 inches in diameter

Preheat oven to 450 degrees.  Place corn tortillas in aluminum foil and sprinkle with a few drops of water before sealing.  Place wrapped tortillas into oven for 10 to 15 minutes.

Combine the oil, lime juice, chili powder, cumin, coriander, garlic, and salt. Coat the fish with the marinade.

Heat skillet over medium-high heat.  Place fish, one fillet at a time in heated skillet.  Cook for 4 minutes on one side and then flip over and cook for 2 minutes more.  Flake fish and place in each tortilla, and top with the Southwestern Slaw and Chipotle Pico de Gallo. Add a dollop of Mexican Crema, fold in half, and serve immediately.  (See below for recipes.)

Southwestern Slaw (from recipe found at www.epicurious.com)

  • 2 cups fine-shredded green cabbage
  • 2 teaspoons lime juice
  • 2 teaspoons honey
  • 2 tablespoons minced red onion
  • 2 teaspoons minced jalapeños
  • 2 teaspoons chopped cilantro
  • Salt, to taste

Combine all the ingredients. Allow the mixture to marinate for at least 30 minutes and up to 8 hours before serving.

Chipotle Pico de Gallo (from recipe found at www.epicurious.com)

  • 1 cup medium-dice tomatoes (seeded before dicing)
  • 4 teaspoons minced red onion
  • ½ teaspoon red wine vinegar
  • ½ canned chipotle pepper, minced
  • Salt, to taste
  • 1 tablespoon cilantro chiffonade (cut into thin strips)

Combine all the ingredients and mix well. The pico de gallo is ready to use now or it can be stored in a covered container in the refrigerator for up to 2 days.

Mexican Crema (from recipe found at www.epicurious.com)

  • ½ cup Mexican sour cream
  • ½ teaspoon finely grated lime zest
  • 2 teaspoons lime juice

Combine all the ingredients and mix well. The cream is ready to use now or it can be stored in a covered container in the refrigerator for up to 2 days.

salty caramel ice cream

I love ice cream.  It has been my most favorite food ever since I was a kid and in fact one of the first things I remember wanting to be when I grew up was an owner of a Dairy Queen.  True story.  My very first job was at a Dairy-Queen-like place in my hometown and I can easily ramble off some of the best places to get ice cream across the country off the top of my head (Herrell’s in Northampton, MA, Cones in New York City, Shatila in Dearborn, MI, Babcock Dairy in Madison, WI, see?)  I would add Jeni’s Splendid Ice Cream in Columbus, OH to this list only I have never actually been there.  If I ever find myself in Columbus you can bet I will be stopping by, but until then I plan to work my way through Jeni’s cookbook.  (Is it still called a “cookbook” when it’s all about ice cream?)

I decided to start with her Salty Caramel ice cream which is apparently her most popular flavor.  I am always a fan of salty and sweet together so dove in even though the first step is to burn raw sugar in a saucepan which I found slightly daunting.  I shouldn’t have.  It was easy!

Jeni’s recipes don’t involve egg yolks which was a first for me when making ice cream and suited me just fine since it is easy to start to cook the egg yolks while making the custard and that is no bueno.  No one wants a cooked egg bite when eating ice cream.  Yick.

This ice cream is divine.  You can taste the burnt sugar caramel-y goodness with the hint of the sea salt.  It is creamy and smooth and all the things you want ice cream to be.  It was also fantastic when paired with the gluten-free brownies I made earlier in the week– especially if you heat the brownies up a bit first!  Mmm…  Going for a jog now.

Salty Caramel Ice Cream (from “Jeni’s Splendid Ice Creams at Home” by Jeni Britton Bauer)

  • 2 cups whole milk
  • 1 tablespoon plus 1 teaspoon cornstarch
  • 1 ½ ounces (3 tablespoons) cream cheese, softened
  • ½ teaspoon fine sea salt
  • 1 ¼ cups heavy cream
  • 2 tablespoons light corn syrup
  • 2/3 cup sugar
  • 2 teaspoons vanilla extract

Mix about 2 tablespoons of the milk with the cornstarch in a small bowl to make a smooth slurry.

Whisk the cream cheese and salt in a medium bowl until smooth.

Mix the cream with the corn syrup in a measuring cup with a spout.

Fill a large bowl with ice and water.

Heat the sugar in a 4-quart saucepan over medium heat until it is melted and golden amber in color.  Remove from the heat and, stirring constantly, slowly add a bit of the cream and corn syrup mixture to the caramel: it will fizzle, pop, and spurt.  Stir until well combined, then add a little more and stir.  Keep adding the cream a little at a time until all of it is incorporated.

Return the pan to medium-high heat and add the milk.  Bring to a rolling boil and boil for 4 minutes.  Remove from the heat and gradually whisk in the cornstarch slurry.

Bring back to a boil over medium-high and cook, stirring with a heatproof spatula, until slightly thickened, about 1 minute.  Remove from the heat.  If any caramel flecks remain, pour the mixture through a sieve.

Gradually whisk the hot milk mixture into the cream cheese until smooth.  Add the vanilla and whisk.  Pour the mixture into a 1-gallon Ziploc freezer bag and submerge the sealed bag in the ice bath.  Let stand, adding more ice as necessary, until cold, about 30 minutes.

Pour into frozen ice cream maker canister and spin until thick and creamy.

Pack the ice cream into a storage container, press a sheet of parchment directly against the surface, and seal with an airtight lid.  Freeze in the coldest part of your freezer until firm, at least 4 hours.