fall is my favorite / apple cake

9.22.13 003

Do certain songs or albums remind you of a particular season or time of year?  For me, Ryan Adams “Love is Hell” always takes me back to one particularly cold January when I spent my evenings driving through neighborhoods in metro Detroit looking for “for rent” signs for a new apartment.  To this day when I hear a song off of that album I swear I can see my breath in the air and snow piled up on the streets.  The album that will always be fall to me is Carole King’s “Tapestry.”  It reminds me of being in the kitchen with my mom, listening to Tapestry with a chill in the air and the distinct smell of apples baking.  Last week I heard “I Feel the Earth Move” on the radio and I knew it was time to start some fall baking.

9.22.13 005

I’ve never made an apple cake before but I had clipped a recipe for one by the chef Marcus Samuelsson out of a magazine years ago and since I have an abundance of apples right now from a very prolific tree in my parents’ yard it felt like the right time to bust it out.

9.22.13 007

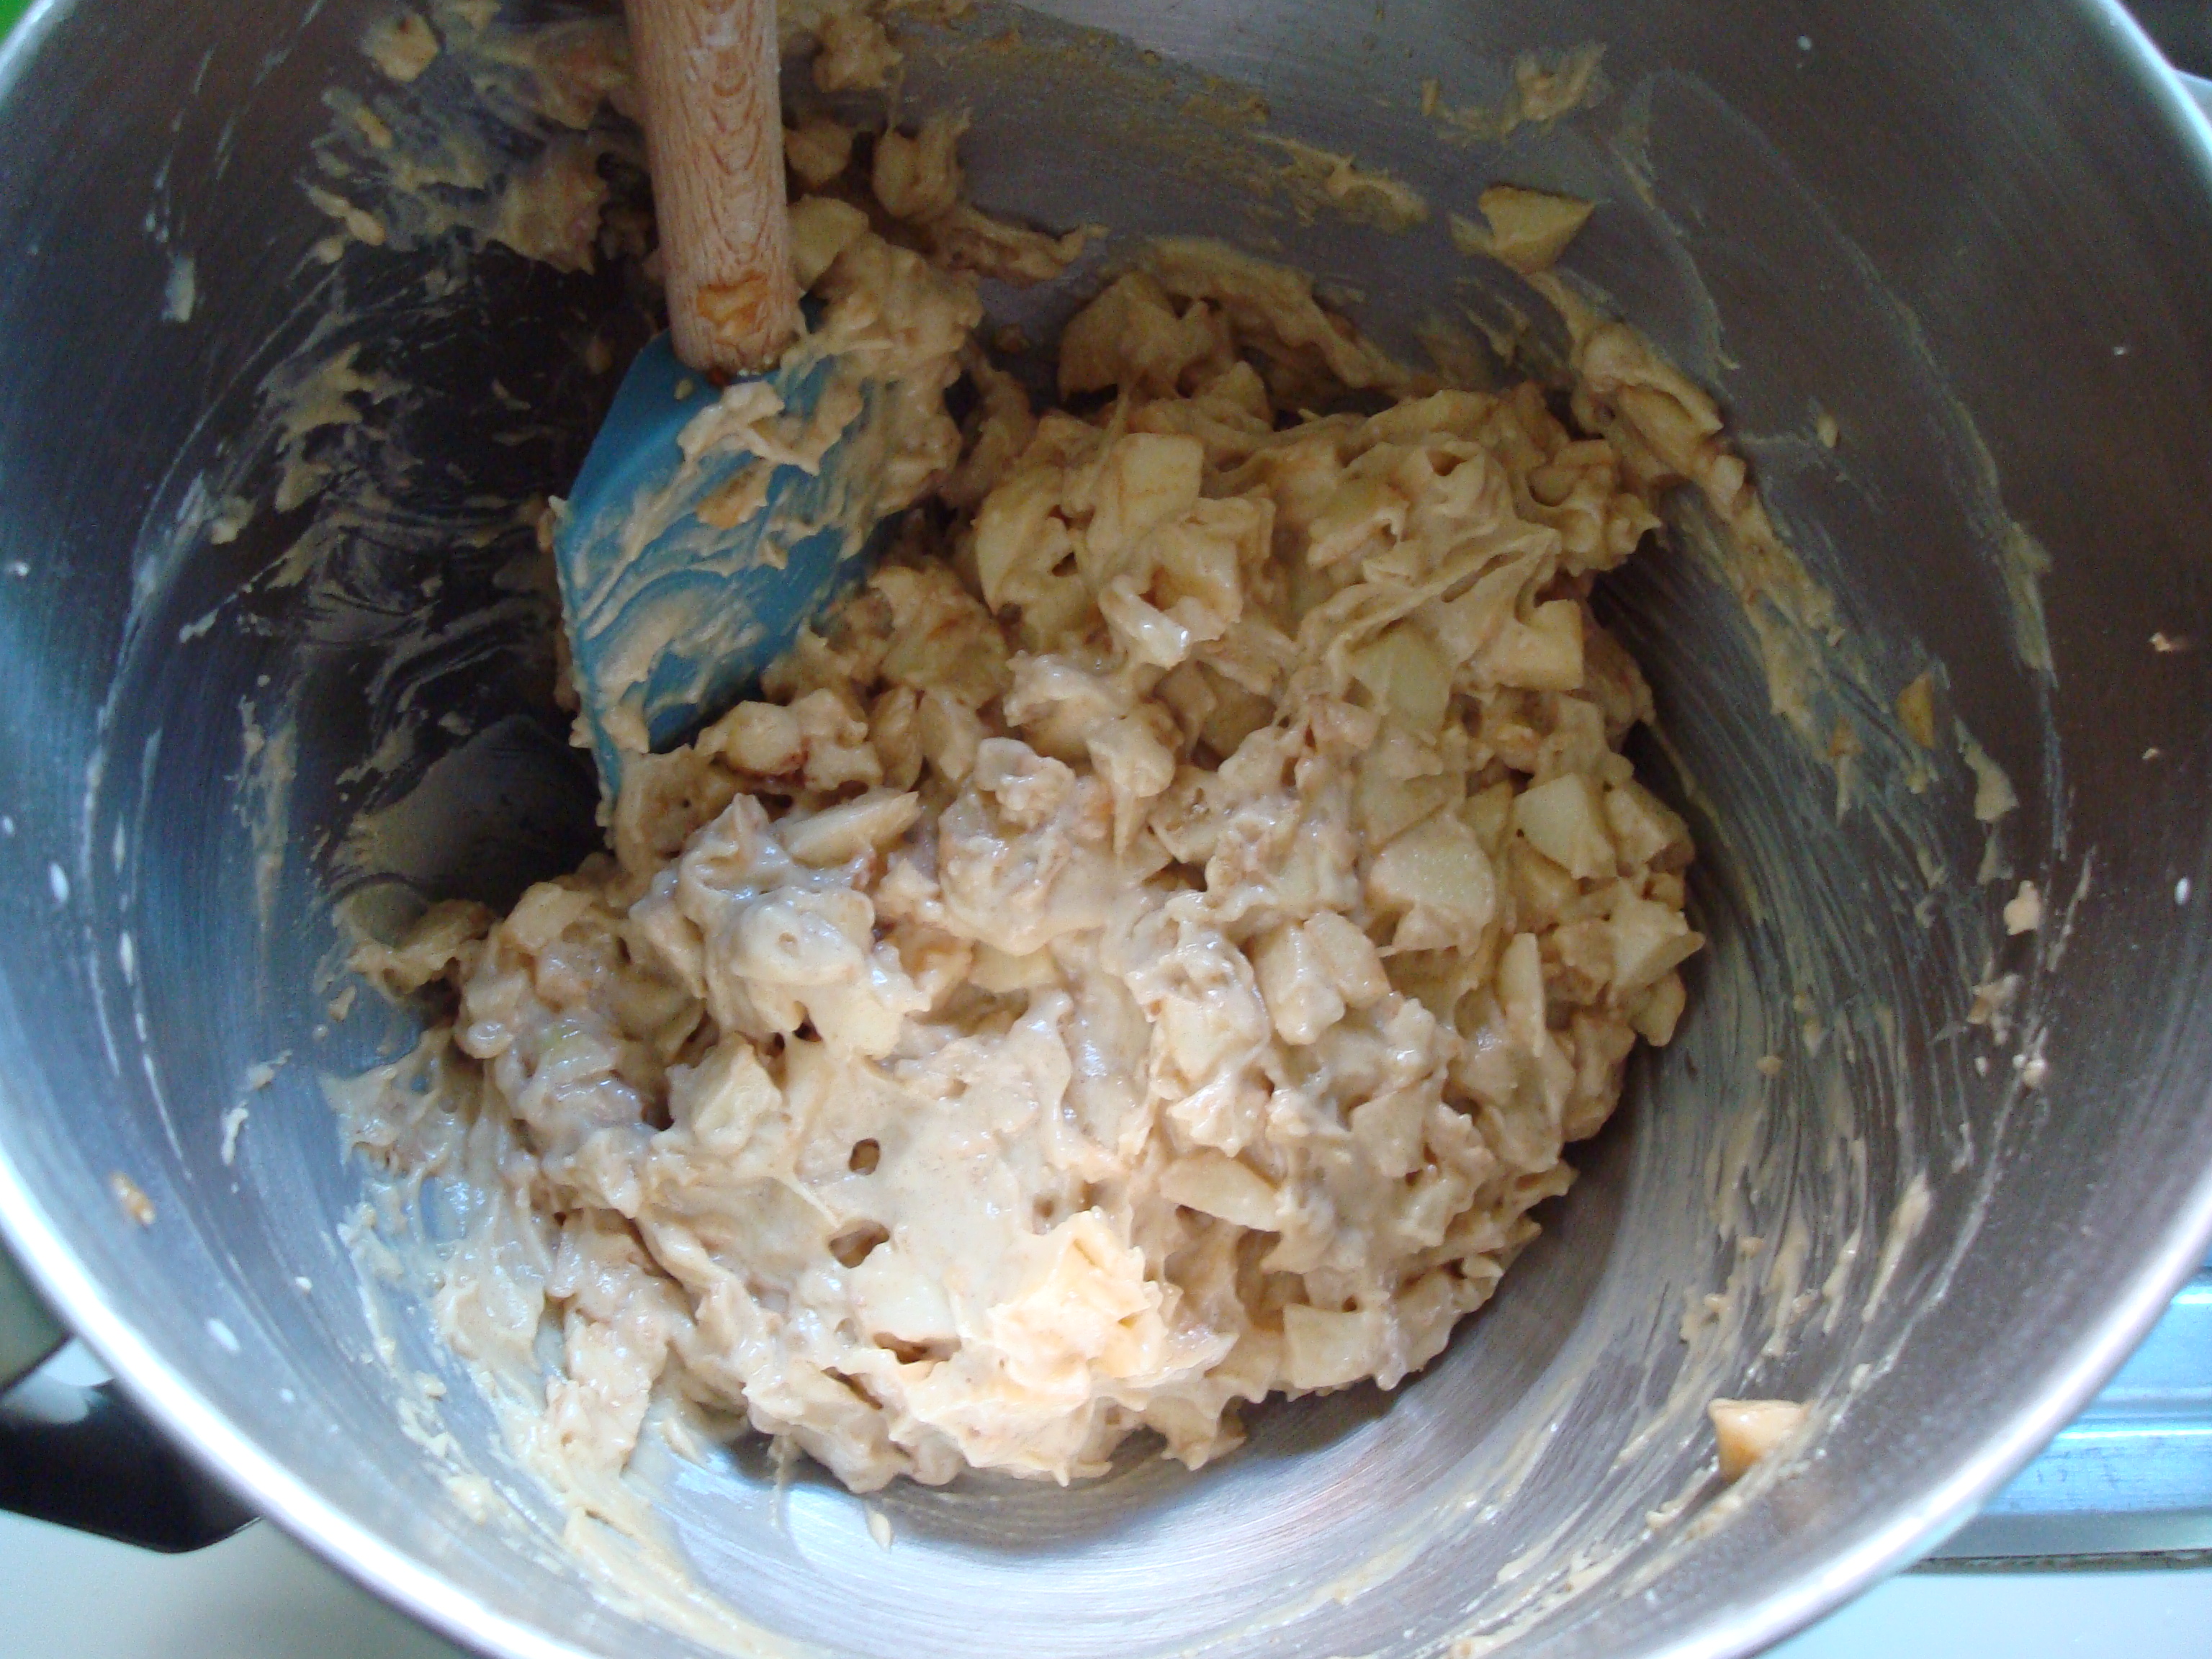
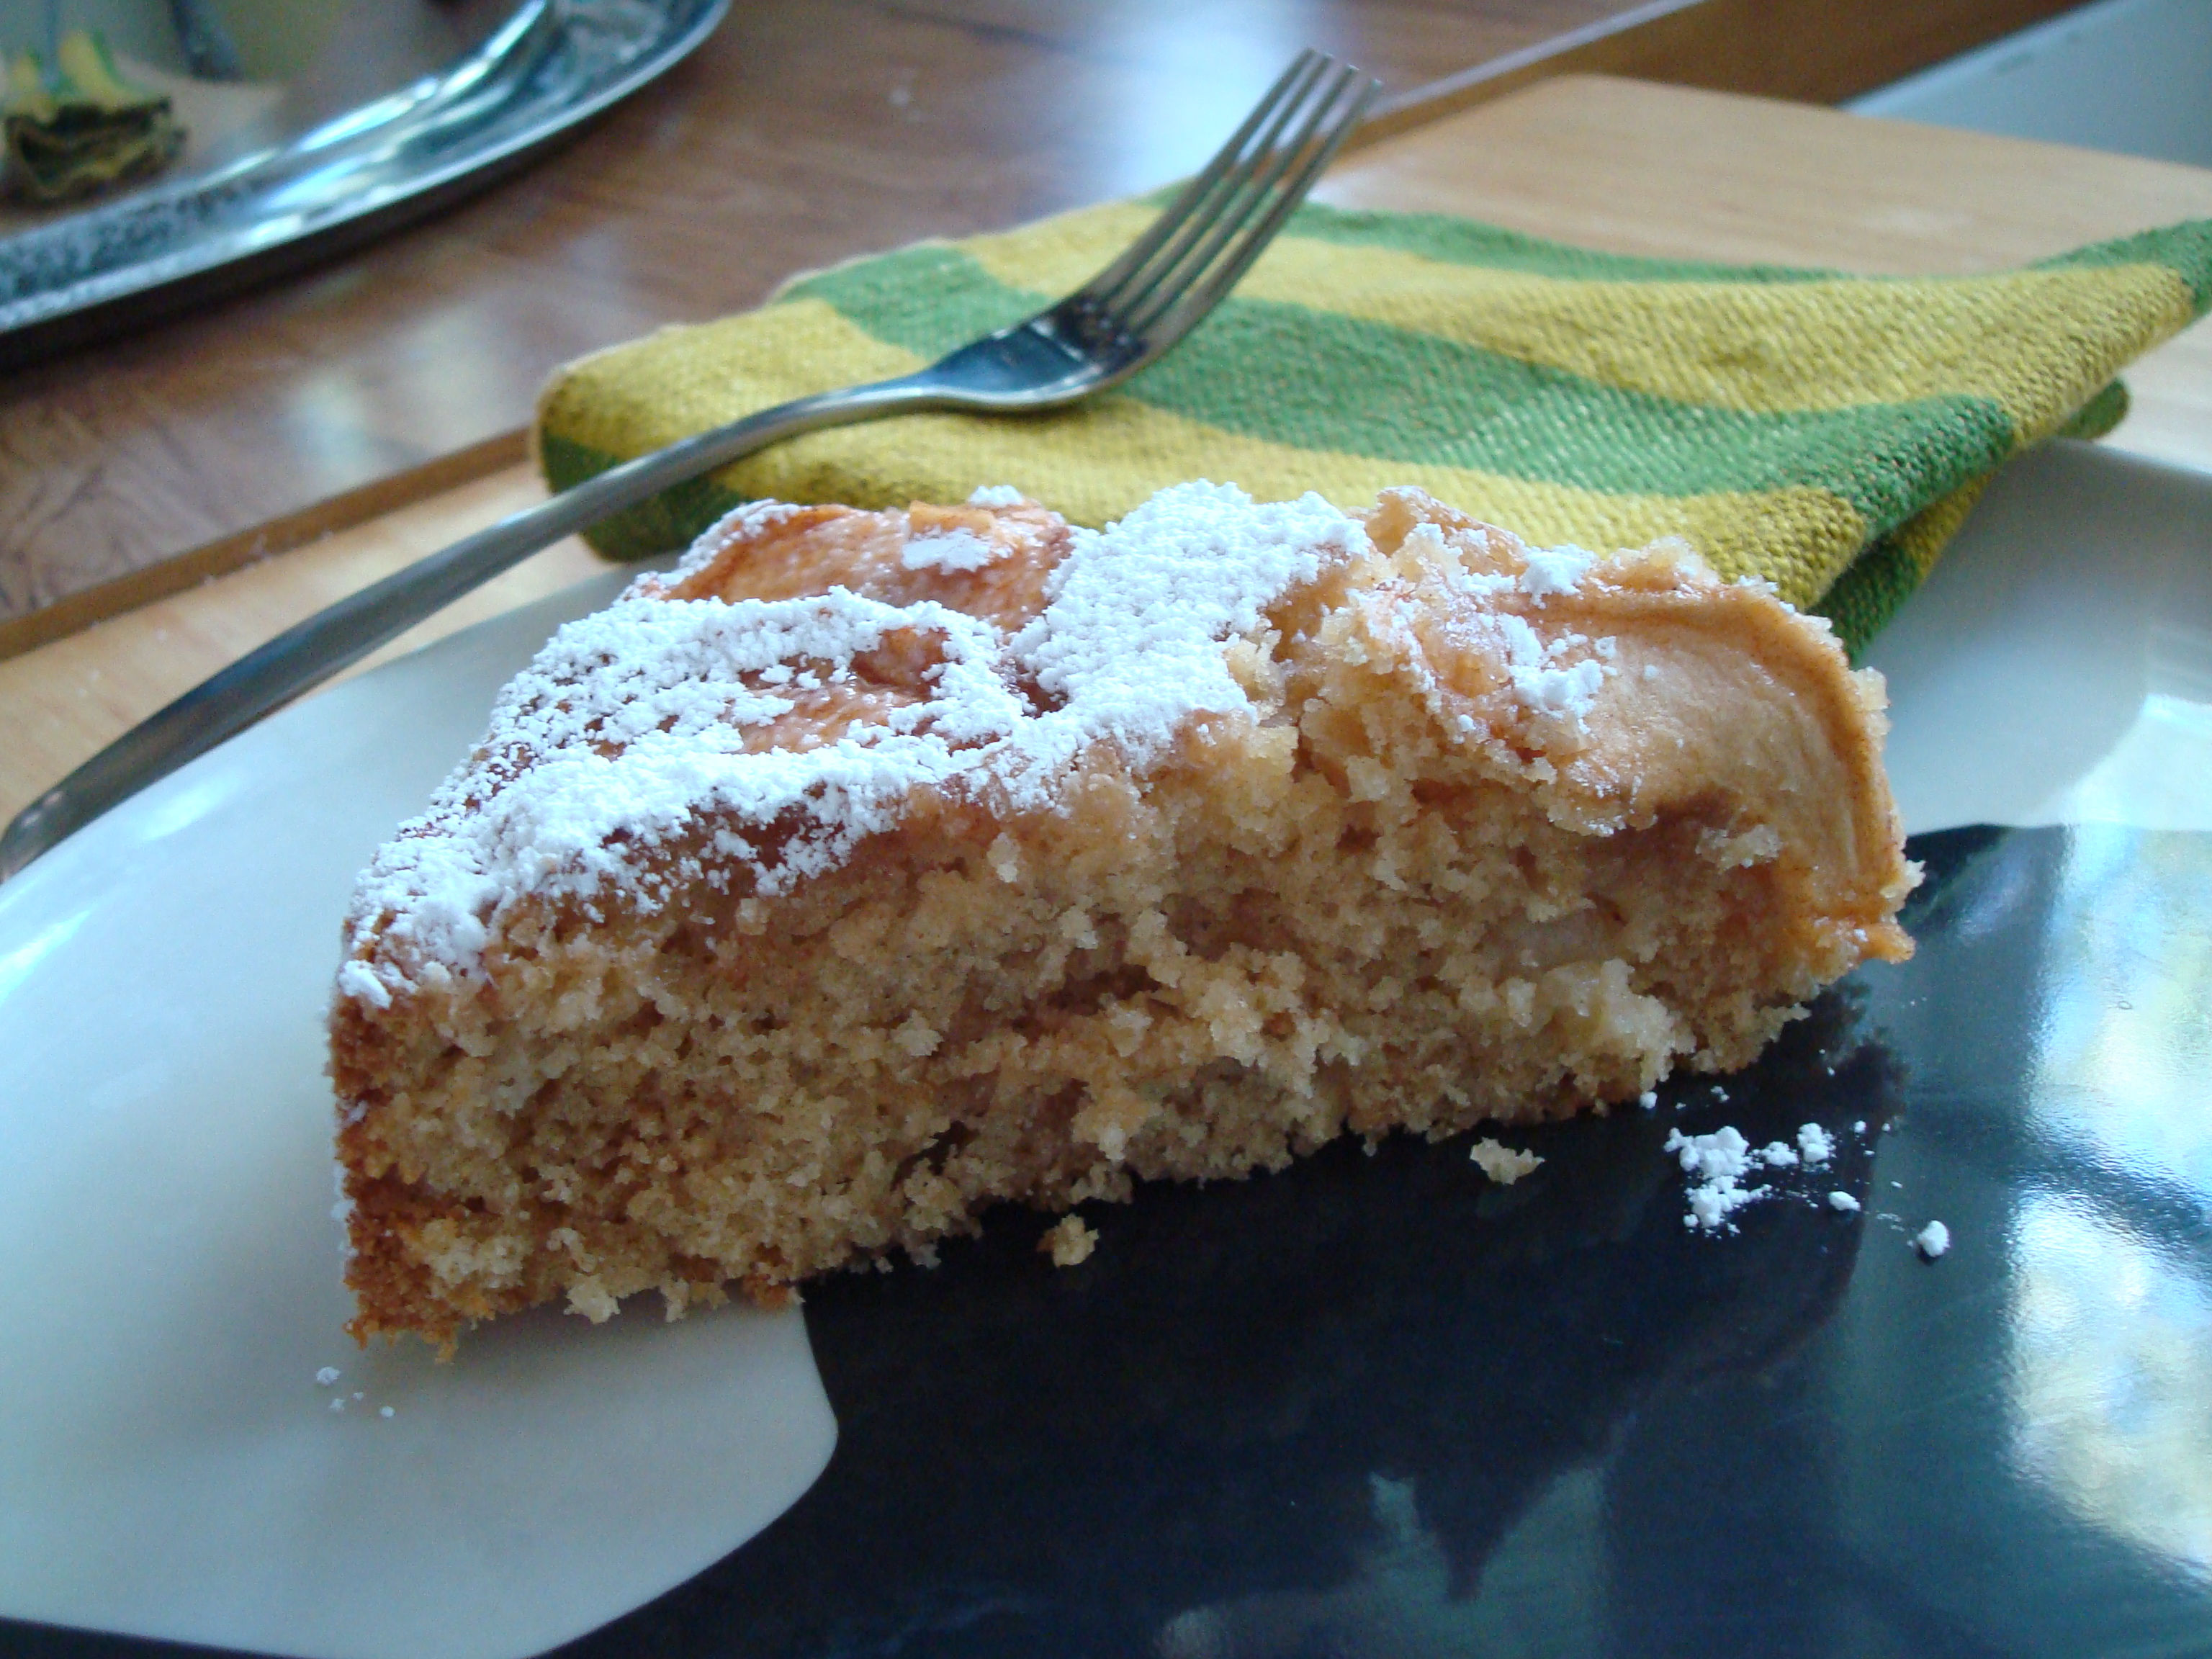
It’s a very simple recipe (which I love) and called for both chopped up apple to be mixed in with the batter and sliced apples to be placed on top of the cake decoratively.  The other ingredients were: half a stick of butter, half & half, flour, white and brown sugar, cinnamon, an egg, and baking powder.  All things I had readily on hand.

9.22.13 012

I did my best placing the apples in an attractive manner on top and since there was extra cinnamon and sugar juice from the apples I thought it might be a good idea to pour that on top of the sliced apples too.  Can’t hurt, right?

9.22.13 018

The resulting cake is so moist and delicious and versatile enough to be served as dessert or even for breakfast that it will for sure be added to my regular rotation of favorite recipes.  Happy Fall!

9.22.13 028

Marcus Samuelsson’s Apple Cake (slightly adapted)

  • 1/2 cup granulated sugar
  • 1/2 cup packed light brown sugar
  • 2 Granny Smith apples (I used 4 small Macs)
  • 1 teaspoon ground cinnamon
  • 4 tablespoons (1/2 stick) unsalted butter at room temperature, plus more for greasing the pan
  • 1 large egg
  • 1-1/4 cups unbleached all-purpose flour, plus more for flouring the pan
  • 2 teaspoons baking powder
  • 2/3 cup half-and-half
  • 2 teaspoons confectioners’ sugar

Preheat the oven to 350 degrees Fahrenheit. Butter a 9-inch springform pan and lightly flour.

Toss together the granulated sugar and brown sugar. Set aside.

Peel and core the apples, then slice one apple into 16 wedges. Combine the cinnamon and 1/3 cup of the sugar mixture in a medium bowl. Add the apple wedges and toss to coat. Roughly dice the remaining apple.

In the bowl of an electric mixer fitted with a paddle attachment, beat together the butter and the remaining sugar mixture on medium speed until light, fluffy, and lemon colored, about 2 minutes. Add the egg and mix until combined. Reduce the speed to low and add the flour and baking powder. Slowly add the half-and-half, and mix until combined. Fold the diced apple into the batter.

Pour the batter into the prepared pan and spread evenly. Arrange 14 of the apple wedges fanned along the outer edge of the pan and place the 2 remaining wedges in the center. Bake for 35 to 40 minutes, or until the center is golden brown.

Remove from the oven to a wire rack to cool completely. Run a small offset spatula around the edges to release the cake from the pan and remove the springform. Sprinkle with confectioners’ sugar, then cut into 12 wedges.

strawberry tartlets

Sadly, strawberry season is over in these parts, though fortunately I picked enough strawberries a few weekends ago that I will have plenty to bake with in the coming months.  Thank goodness for freezers!

strawberries

Months ago I purchase some adorable little tartlet pans but had not yet used them for anything so I decided to amend the situation this past weekend.  I also have been meaning to experiment more with gluten-free baking since it intrigues me and I have many gluten-free flours in my pantry, so when I found a pate sucre (sweet crust) recipe from my La Tartine Gourmande cookbook I was inspired to marry it with some freshly picked strawberries in said tartlet pans.

6.30.13 073

 The recipe called for sweet white rice flour which I have plenty of but also quinoa flour which I did not have.  I found it in a local health food store but it was crazy expensive but since I always have actual quinoa in my pantry I decided to go DIY and grind it into flour myself.  Many websites advised toasting the quinoa before grinding it into flour I ignored that and just ground it down using my coffee grinder.  I was a bit nervous how it would turn out because quinoa can sometimes be a little bitter but in this particular recipe there was enough else going on (namely confectioners’ sugar) that it turned out fine.  Next time I may try to toast the quinoa before grinding, however, and I will let you know if it’s worth it or not.

6.30.13 078

This dough had to be refrigerated for a few hours and then brought to room temperature before being rolled out.  Upon rolling the dough out I used a biscuit cutter to get it into shapes that fit neatly into the tartlet pans but neatness is definitely not required here.  You could pat the dough into the pans in any manner you choose and it will still turn out fine, I was just being fancy.  I pre-baked the tartlet crusts so put parchment paper into each tartlet pan and then weighted that with dried beans.  Apparently you can buy pie weights but I don’t see the point since dried beans or rice work just as well and I always have them on hand.  (Save them and use them as intended, just let them cool after their stint as pie weights and put them back with the rest of the beans or rice.)

6.30.13 080

I did research for the strawberry filling but wound up shooting from the hip since a lot of what I was finding seemed more complicated than it needed to be.  I wanted to keep it simple with strawberries as the main star.  The one (simple but) slightly fancy thing I did was to use the seeds from half of a vanilla bean pod to scent/flavor the sugar I used to macerate the strawberries.  It’s so easy to do but makes the dish more luxurious.

6.30.13 069

Sprinkle the vanilla-infused sugar on top of sliced strawberries and let the berries macerate for about an hour.

6.30.13 083

Then pour the berries into the pre-baked tartlet shells and bake for about 10 to 15 minutes more in the oven to let the strawberries roast a little bit.

6.30.13 084

The tartlets are best served warm from the oven, and if you wanted to serve them with a little ice cream, whipped cream, or even a dollop of mascarpone cheese I would say that you and I should be friends.

6.30.13 097

Strawberry Tartlets

Pate Sucre (Sweet Crust) (from “La Tartine Gourmande: Recipes for an Inspired Life” by Beatrice Peltre)

  • ½ cup white rice flour
  • 1/3 cup quinoa flour
  • 1/3 cup cornstarch
  • 1 ½ teaspoons xanthan gum
  • 1/3 cup confectioners’ sugar
  • 7 tablespoons unsalted butter, chilled and diced
  • 1 small egg

In the bowl of a stand mixer fitted with the paddle blade, combine the flours, cornstarch, xanthan gum, and confectioners’ sugar.  Work on medium speed to obtain a fine mixture.  Add the butter and work again until crumbles form.  Add the egg and work until the dough detaches from the bowl and forms a ball.  Wrap in plastic wrap and refrigerate for a minimum of 3 hours.  Bring to room temperature before using (about 30 minutes, when the crust doesn’t feel hard).

Using gluten-free dough, generously dust work surface and rolling pin.  Roll out room-temperature dough to circle slightly larger than 10-inch tart pan.  If you are using tartlet pans as I did, the shape of the rolled-out dough doesn’t matter so much as you will be fitting it into smaller pans.  I used a floured biscuit cutter to portion out dough for the tartlet pans but use whatever method you feel is best.

Preheat oven to 350 degrees F.  Once you have rolled out the dough and pressed it into the tart mold(s), cover it with a piece of parchment paper, and top it with pie weights (dry rice or beans work too).  Bake the crust for 10 or 15 minutes, until light brown.

Strawberry Filling:

  • 3 cups washed, hulled, and sliced strawberries
  • 3 tablespoons sugar
  • ½ vanilla bean pod

Slice vanilla bean pod in half and set half away for use at a later time.  Scrape the seeds out of the half you are using into a small bowl.  Pour sugar into the same bowl and use clean fingers to rub the vanilla seeds into the sugar.

Place sliced strawberries into medium-sized bowl.  Sprinkle vanilla sugar mixture over the top and let berries macerate for about an hour.

After berries have macerated, pour into pre-baked tart shells and bake for an additional 10 to 15 minutes in preheated 350 degree F oven.  Enjoy tartlets warm with a dollop of ice cream, whip cream, or mascarpone cheese.

cranberry, pear, and ginger chutney

Why do cranberries only get love around Thanksgiving time?  I guess dried cranberries have sort of become a thing over the past decade or so (thanks Craisins) but fresh cranberries need to take center stage more often, too.  Why?  Because they are beautiful and delicious.

11.22.12 021

I don’t think I was ever subjected to old-school cranberry sauces (of the jelly mould variety) in my youth, and if I was I must have blocked it from memory.  As an adult I’ve become quite fond of cooking cranberries down into chutneys to serve with turkey or spread on sandwiches.  I thought I had a winner of a recipe in years past until I tried this one this year.  This one involves pears, ginger, lemon and orange zest, cinnamon, cloves, and shallots.  It’s a whole lotta beautiful in a bowl.

11.22.12 185

Once you’ve cooked the cranberries long enough they start to soften and burst and become wonderful.  Yes I made this chutney for Thanksgiving but I totally think it would be good any time of year that you are able to find fresh cranberries.  When paired with a little Brie cheese it makes an out-of-this-world grilled cheese.  Trust me on this one.  It would also make an excellent addition to a burger off the grill  in the warmer months or an excellent accompaniment to a cheese plate with some crackers, grapes, and candied nuts.  Dream big.  Just don’t save it for only one day a year.

11.22.12 068

Cranberry, Pear, and Ginger Chutney (modified slightly from recipe found at www.epicurious.com)

  • 2 cups apple cider vinegar
  • 1 cup finely chopped shallots
  • 1/4 cup finely chopped peeled fresh ginger (from about 2-ounce piece)
  • 2 1/2 teaspoons finely grated lemon peel
  • 2 1/2 teaspoons finely grated orange peel
  • 1 cinnamon stick, broken in half
  • 1/4 teaspoon ground cloves
  • 1 12-ounce bag fresh cranberries
  • 1 1/4 cups (packed) golden brown sugar
  • 2 large firm Bosc pears (about 18 ounces total), peeled, cored, cut into 3/4-inch cubes (about 2 1/2 cups)

Combine apple cider vinegar, onion, ginger, lemon peel, orange peel, cinnamon stick pieces, crushed red pepper, and ground cloves in heavy large saucepan. Boil mixture until reduced to 1 1/2 cups, about 10 minutes. Add cranberries, brown sugar, and pears; stir over medium heat until sugar dissolves. Reduce heat to medium-low; cover and simmer until pears are very tender, berries collapse, and flavors blend, stirring occasionally, about 30 minutes. Remove from heat; discard cinnamon stick pieces. Using potato masher, mash mixture coarsely. Transfer chutney to bowl and cool. DO AHEAD: Can be made 3 days ahead. Cover and chill. Bring to room temperature before serving.

chai apple pie

I love pie. A lot. I also love that others love pie so much that there are entire bakeries, blogs, and cookbooks devoted to just it without cupcakes or cookies or other filler. One can do a lot with pie.

Recently I purchased one of the aforementioned pie-only cookbooks, “A Year of Pies” by Ashley English, and have tried out a few of the recipes including the star of this post, an apple pie made with chai tea spices. Now I love me some chai tea and it totally sounded like a very clever and logical thing to do to pair it with apples, and boy was it.

The cinnamon, nutmeg, cloves, cardamom, and black pepper (yes, black pepper!) turn it up a notch and add a little excitement to the classic apple pie recipe. I brought it in to work and one coworker who had a piece told me it was so good she dreamt about it that night. High praise!

Some people have told me they are intimidated about making pies but I really think they are one of the easiest things to make as long as you have an ounce of patience when it comes to making your own crust. It’s really not that hard, I promise! The crust recipe below calls for half shortening, half butter, though you could make it with entirely one or the other if you like. In general I avoid shortening like the plague as it is usually so processed that a tub of it would outlive us all and then some, but I have found an organic, 100% palm oil version from Spectrum that I really like and feel better about using. It does add a nice flakiness to the crust.

Chai Spice Apple Pie (adapted slightly from “A Year of Pies: A Seasonal Tour of Home Baked Pies” by Ashley English)

  • 1 recipe Basic Pie Dough

Chai Spice Blend

  • 1 teaspoon cardamom seeds or ground cardamom
  • ½ teaspoon black tea
  • ¼ teaspoon whole cloves
  • ¼ teaspoon black peppercorns
  • 1 teaspoon ground cinnamon
  • ¼ teaspoon ground ginger

Filling:

  • 3 pounds apples, peeled, cored, quartered, and cut into ½-inch-thick slices
  • 4 tablespoons all-purpose flour
  • ¼ cup granulated sugar
  • 2 tablespoons lemon juice
  • ½ teaspoon sea salt
  • 2 tablespoons unsalted butter, diced, for dotting the filling

Remove one dough disk from the refrigerator. Roll out the dough on a lightly floured surface and fit it into a 9-inch pie pan. Trim the crust overhang to 1 inch, then place the crust in the refrigerator while you prepare the filling.

Using either a mortar and pestle or a spice or coffee grinder, grind the cardamom seeds (if using), black tea, while cloves, and peppercorns to a powder.

Pour the ground spices into a fine-mesh sieve placed over a small bowl. Gently shake the sieve so all but the larger pieces fall through. Discard the larger pieces left in the sieve.

To the freshly ground spices in the bowl, add the ground cardamom (if using), cinnamon, and ginger. Whisk well to combine.

Combine all of the filling ingredients, including the chai spice blend, in a medium-sized mixing bowl. Using either clean hands or a large spoon, toss until all of the ingredients are fully combined and the apple slices are evenly coated.

Pour the apple mixture into the prepared crust, mounding in the center. Dot the surface with diced butter.

Roll the remaining dough disk into a 12-inch circle. Use a small pastry cutter to cut decorative images in the dough, if desired.

Roll the top crust loosely over your rolling pin and unroll it over the filling in the pie pan, making sure it’s centered. Trim the top crust overhang to 1 inch and tuck the edges under the bottom crust overhang. Crimp the edges decoratively.

Place the pie in the refrigerator for 15 minutes.

Meanwhile, preheat the oven to 425 degrees F.

Place the pie on a baking sheet lined with parchment paper or aluminum foil to catch overflow juices and bake at 20 minutes. Reduce the oven temperatures to 375 F and continue baking for 30 to 35 minutes longer, until the crust is golden and juices are bubbling in the center of the pie.

Cool at least 1 hour before serving.

Basic Pie Dough (from “A Year of Pies: A Seasonal Tour of Home Baked Pies” by Ashley English)

  • 2 ½ cups all-purpose flour
  • 1 ¼ teaspoon sea salt
  • 6 tablespoons (3/4 stick) unsalted butter, chilled and cubed
  • ¾ vegetable shortening, chilled and cubed
  • ¾ cup ice water

Mix the flour and salt together in a medium-large bowl.

Using a pastry blender or two forks, cut in the butter and shortening until the mixture resembles coarse meal (you should still have some rather large bits of butter and shortening when you’re done.)

Slowly drizzle in the ice water and stir with a large spoon until the dough begins to clump.

Transfer the dough to a floured work surface and, using your hands, fold it into itself until the flour is fully incorporated into the fats. The dough should come together easily but should not feel overly sticky.

Divide the dough in half, shape it into two balls, and pat each ball into a ½-inch thick disk. Wrap each in plastic wrap and refrigerate for at least an hour.

cherry rhubarb pie with old fashioned crust

That I love baking is no secret but what I most love to bake is pie.  Any kind of pie: strawberry rhubarb, apple with cheddar cheese crust, chess, hand pies, even peach pie with gluten-free crust.  I love that there are now blogs dedicated solely to pie and bakeries that make nothing but, there was even a whole week dedicated to the subject on NPR.

There were two things I had always wanted to try with pie but hadn’t up until last week and that was to make crust the old-fashioned way, with lard, and secondly to use a pie bird as the venting method.

Lard is rendered pork fat so is obviously out for vegetarians and vegans and has also gotten a bad wrap for being high in fat, but it turns out it might not be as bad as once was thought.  It actually is lower in saturated fat than butter.  Not that I’m throwing the baby out with the bath water on butter anytime soon but lard might have its place in modern cooking too.  It was easy to find a tub of it at my food co-op and was very easy to work with making the dough.  I will for sure experiment with it more in the future.  The pie bird was cute and also easy to work with but I will likely go back to my mom’s method of cutting the initial of the pie fruit with a butter knife into the top crust.  It’s more nostalgic for me than the pie bird even though they’ve been around for ages.

The filling for this pie consisted of what I had on hand in my freezer which happened to be cherries and rhubarb.  What a great combination!  It’s like when you make soup out of what you’ve got in your veggie drawer and it turns out unexpectedly amazing.  Love it when that happens.

“Best-Ever Pie Crust”  (from www.epicurious.com)

Yield: Makes 2 pie crusts (enough dough for 1 double-crust pie, 1 lattice-topped pie, or 2 single-crust pies)

  •   2 ½ cups unbleached all-purpose flour (I used 2 cups white flour and ½ wheat flour)
  •   1 ½ teaspoons sugar
  •   1 teaspoon salt
  •   ½ cup (1 stick) chilled unsalted butter, cut into 1/2-inch cubes
  •   ½ cup chilled lard or frozen nonhydrogenated solid vegetable shortening, cut into 1/2-inch cubes
  •   5 tablespoons (or more) ice water

Blend flour, sugar, and salt in processor. Add butter and lard; using on/off turns, blend until mixture resembles coarse meal. Transfer mixture to medium bowl. Add 5 tablespoons ice water and mix with fork until dough begins to clump together, adding more water by teaspoonfuls if dry. Gather dough together. Divide dough in half; flatten each half into disk. Wrap each disk in plastic   and refrigerate at least 1 hour. DO AHEAD Can be made 3 days ahead. Keep refrigerated. If necessary, soften slightly at room temperature before rolling out.

Cherry Rhubarb Pie

  •   2 cups chopped rhubarb (fresh or frozen)
  •   2 cups tart cherries, pitted
  •   2/3 cups sugar
  •   2 tablespoons all-purpose flour or tapioca flour
  •   Pie crust dough for 1 double-crust pie

Combine all ingredients in bowl and let sit for 15 minutes.

Preheat oven to 400 degrees F.

On a lightly floured surface, roll out one half of pie crust dough to fit into pie plate. Transfer pastry to pie plate; add filling. Roll out remaining pastry to fit top of pie. Place over filling. Trim, seal and flute edges. Cut slits in pastry.

Bake pie for 40 to 45 minutes or until crust is golden.  Cover edges with foil during the last 15 minutes of baking to prevent overbrowning if necessary.  Cool on a wire rack.