compost / kitchen sink cookies

This time of year always puts me in the mood to clean things out.  Closets, drawers, the pantry, the freezer.  The latter two came in handy for this particular recipe.

3.21.14 011

These cookies were inspired by the Compost Cookie at Momofuku Milk Bar.  I haven’t visited NYC for 2 years and have been feeling some serious withdrawal for my favorite bakeries so making these helped ease the pain, and as I mentioned previously, it helped me do a bit of cleaning out at the same time!

3.21.14 008

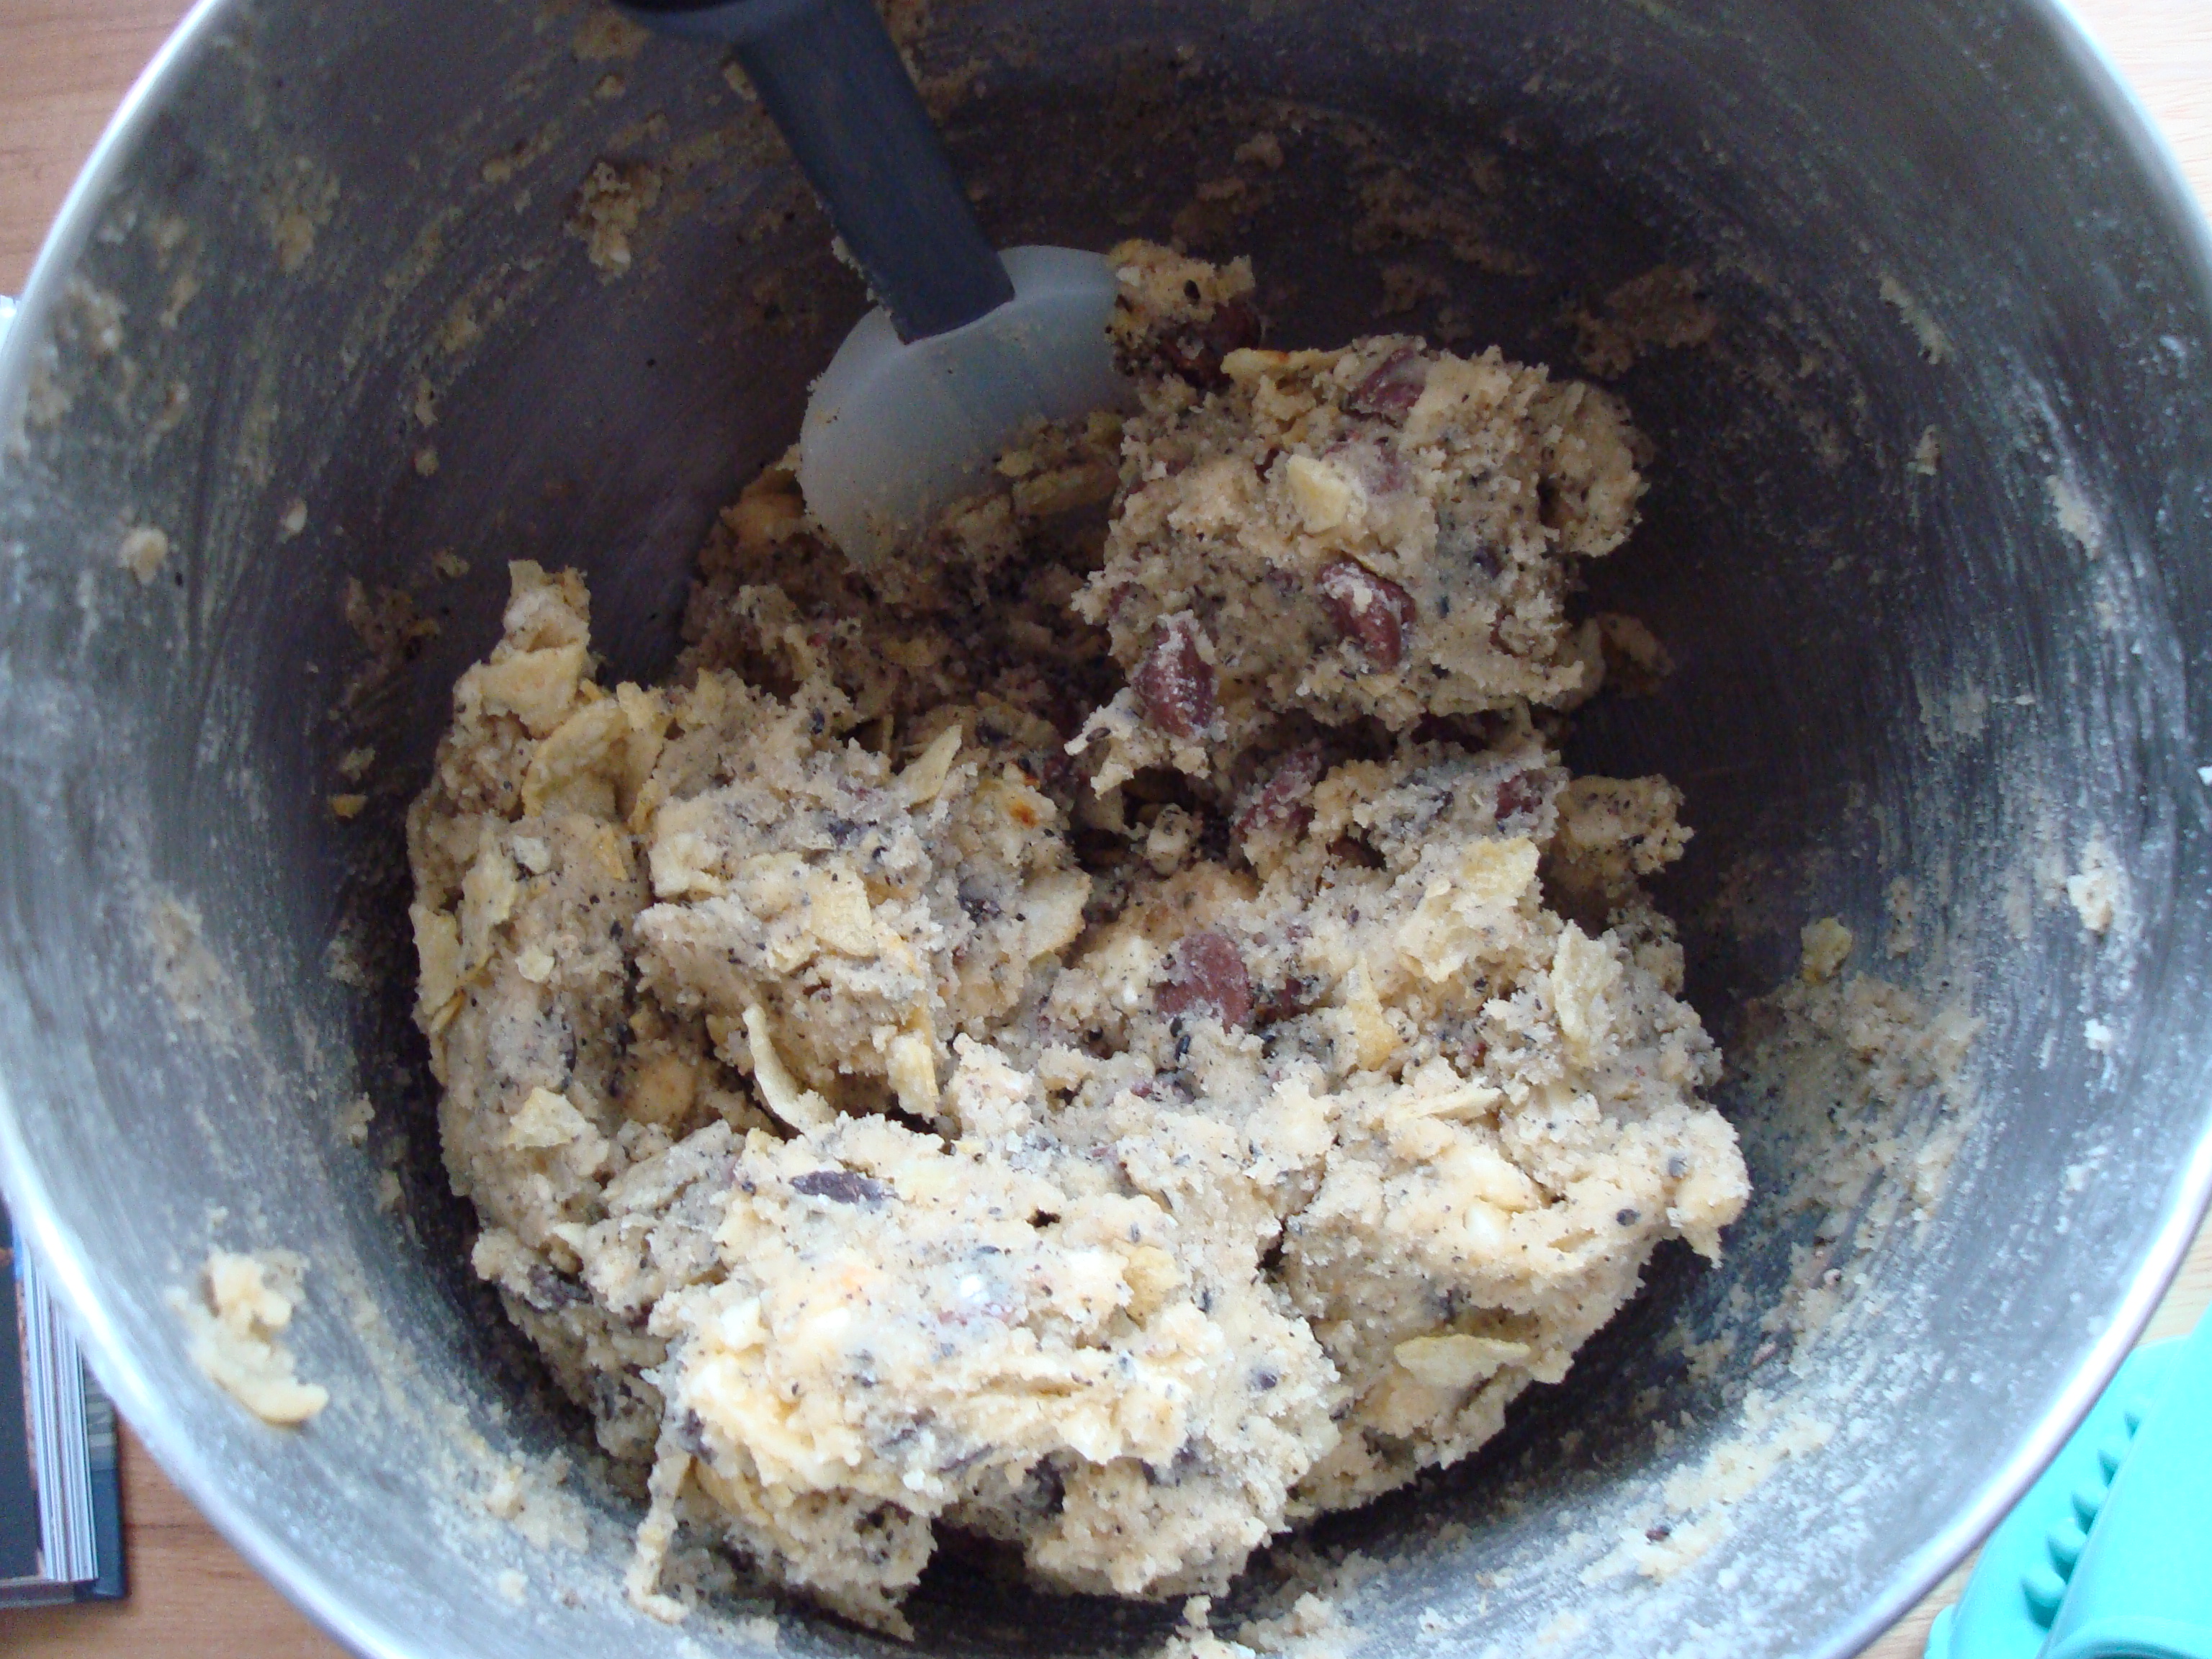
The original recipe calls for pretzels, potato chips, chocolate chips, ground coffee, butterscotch chips, rolled oats, and graham cracker crust but I only had a few of those items on hand so I improvised.  I used potato chips, semi sweet chocolate chips and chocolate chunks (yes, I often have both on hand), white chocolate chunks, ground up homemade vanilla wafers (left over in my freezer from a Thanksgiving pie crust), and ground up black sesame seeds (leftover from the last time I made black sesame ice cream and accidentally ground up too many seeds.)

3.21.14 017

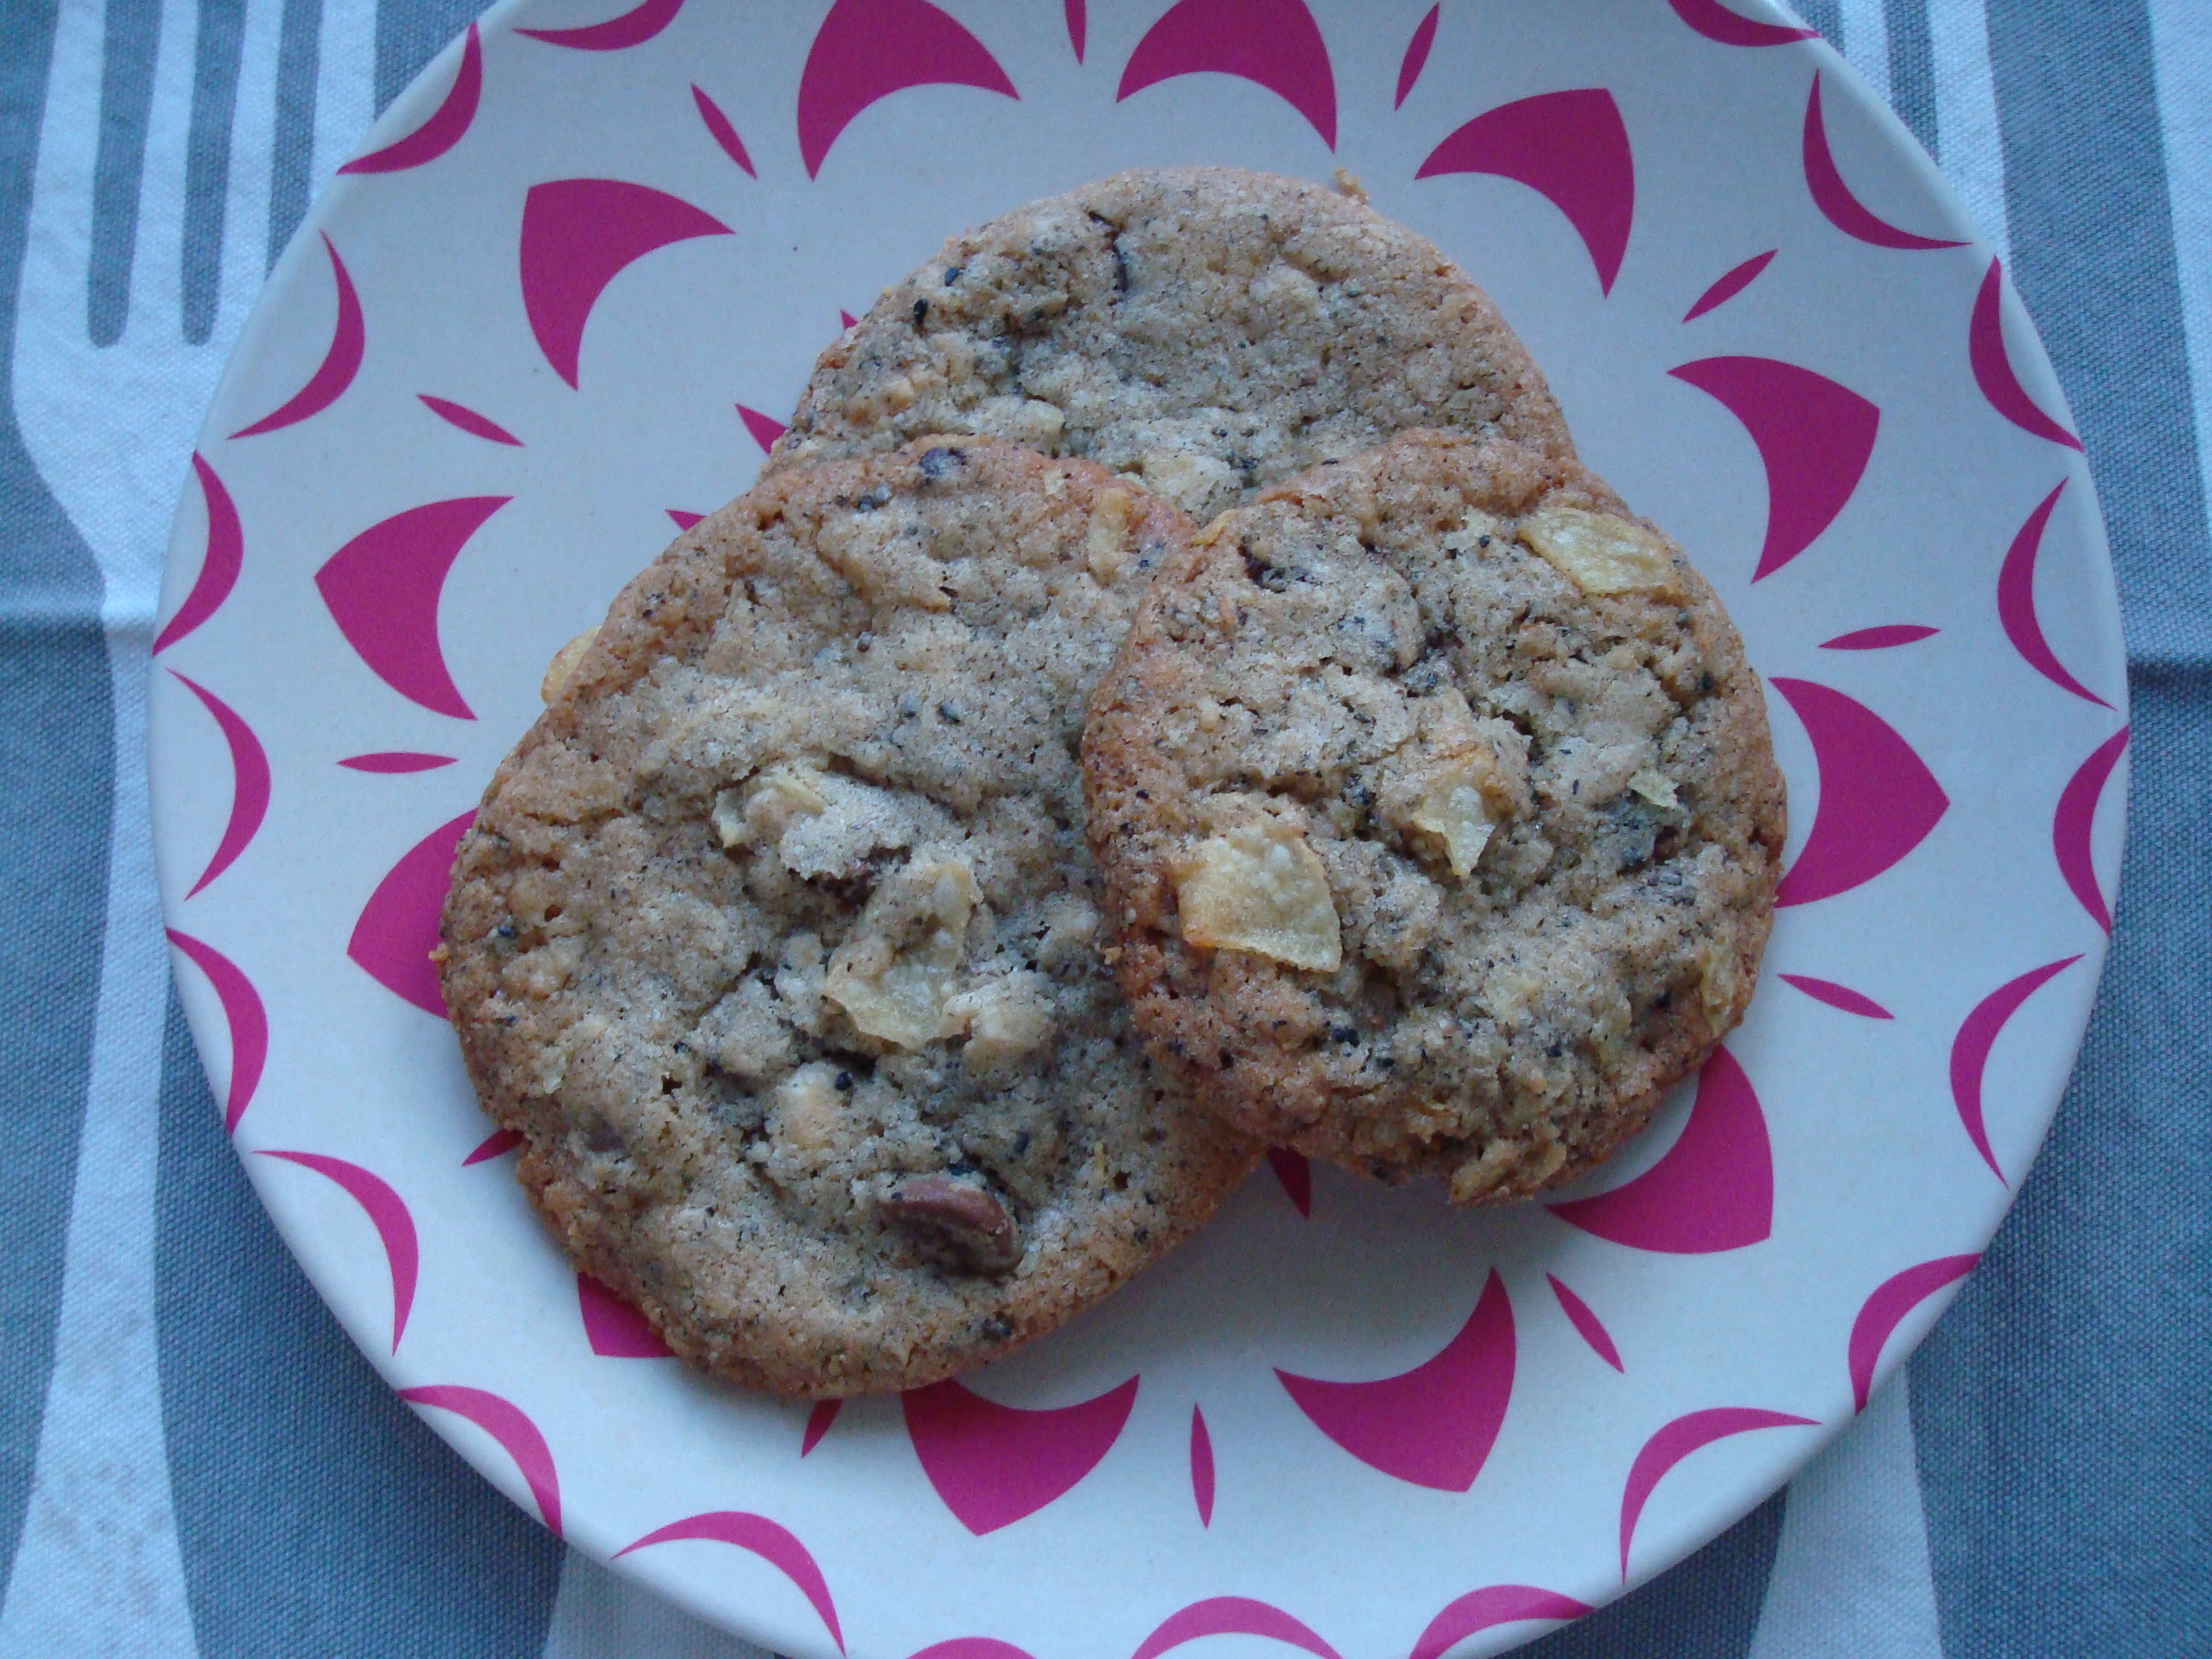
The results were a multi-textured cookie that satisfied both salty and sweet cravings and almost felt like a meal due to their robustness.  And better yet, I cleared out some space for more random leftover goodies from future baking projects!

Kitchen Sink Cookies (adapted from the Compost Cookies recipe in “Milk: Momofuku Milk Bar” by Christina Tosi)

  • 2 sticks butter
  • 3/4 cup granulated sugar
  • 2/3 cup tightly packed brown sugar
  • 1 egg
  • 1/2 teaspoon vanilla extract
  • 1 1/3 cups all-purpose flour
  • 1/2 teaspoon baking powder
  • 1/4 teaspoon baking soda
  • 1 teaspoon kosher salt
  • 1 cup chocolate chips (I used a combo of milk, semi-sweet, and white chocolate chunks as that is what I had on hand)
  • 2 cups potato chips (Cape Cod brand are recommended because they are crunchy and don’t break down too much in the mixing process)
  • 1 1/2 cups of any other mix-ins you have on hand, I used ground homemade vanilla wafers I had leftover in my freezer from a Thanksgiving pie crust, as well as ground black sesame seeds that I had leftover from the last time I made black sesame ice cream; other recommendations are pretzels, butterscotch or peanut butter chips, ground coffee (2 1/2 teaspoons is the recommended measurement for ground coffee), old-fashioned rolled oats, but feel free to experiment

Combine the butter, and sugars in the bowl f a stand mixer fitted with the paddle attachment and cream together on medium-high for 2 to 3 minutes.  Scrape down the sides of the bowl, add the egg, and vanilla, and beat for 7 to 8 minutes.

Reduce the speed to low and add the flour, baking powder, baking soda, and salt.  Mix just until the dough comes together, no longer than 1 minute.  Scrape down the sides of the bowl with a spatula.

Still on low speed, add the chocolate chips and any other mix-ins except for potato chips and pretzels, and mix just until incorporated.  Add the potato chips and pretzels (if using) and paddle, still on low speed, until just incorporated.  Be careful not to overmix or break too many of the pretzels or potato chips.

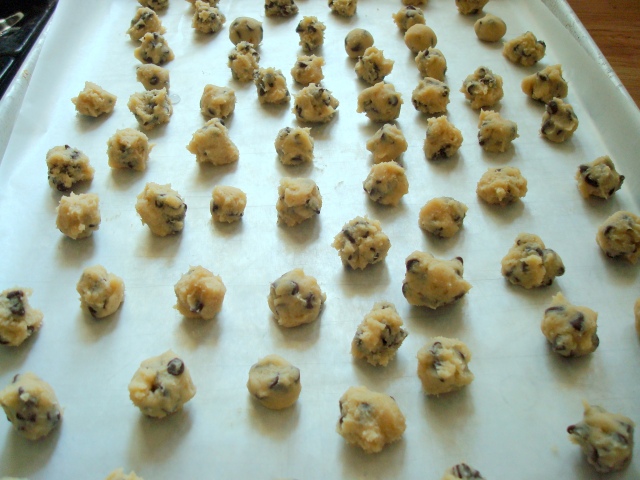
Portion out the dough in approximately 1/3 cup measurements onto a parchment- or Silpat-lined baking sheet.  Pat the tops of the cookie dough flat.  Wrap the sheet pan tightly in plastic wrap and refrigerate for at least 1 hour, or up to 1 week.  Do not bake your cookies from room temperature as they will not bake properly.

Heat the oven to 375 degrees F.

Arrange the chilled dough a minimum of 4 inches apart on parchment- or Silpat-lined baking sheets.  Bake for 18 minutes.  The cookies will puff, crackle, and spread.  After 18 minutes they should be very faintly browned on the edges yet still bright yellow in the center.  Give them an extra minute or so if that is not the case.

Cool the cookies completely on the baking sheets before transferring to a plate or an airtight container for storage.  At room temp, cookies will keep fresh for 5 days; in the freezer, they will keep for 1 month.

strawberry balsamic pie

6.14.13 004

I know it’s not quite strawberry season yet, but after the long winter we’ve been experiencing I was in need of a little summer.  Fortunately for me, I still had two bags full of strawberries that I picked last summer in my freezer.  Once I opened up the bag of strawberries– I kid you not, it smelled like summer.  There’s just something about freshly picked berries that are so much more fragrant (even after 8 months in the freezer, apparently) than the fresh strawberries at the supermarket this time of year.  Heavenly.

3.21.14 028

Also very fortunately for me, for Christmas I received an awesome pie cookbook by the Four & Twenty Blackbird sisters and wanted to try a recipe from it.

3.21.14 029

As with any pie, you start with the crust.  Their all-butter pie crust recipe was slightly different from other crusts I’ve made as it called for a little cider vinegar to be incorporated along with the ice water which intrigued me.  It added a nice little tang to the crust, though once baked was not super noticeable.

3.21.14 031

In addition to the main event of strawberries, the recipe called for a baking apple to be grated into the filling.  I am guessing this might be to help thicken it up, since the berries break down to a liquid, and once baked I really didn’t pick up on the apple flavor so the trick worked.

3.21.14 033

Into the filling the recipe also called for balsamic vinegar, which is what intrigued me about the recipe since I liked the combination of strawberries and balsamic so much last summer when I made them into ice cream; the recipe also called for a few dashes of Angostura bitters to be added as well.  The authors say they think bitters add a little something to the pie, and though I can’t put into words exactly what that is, I would have to agree.

3.21.14 035

Just look how summer-y the filling looks before getting a top put on it!  You can almost feel the warm sun.

3.21.14 037

The recipe recommended a lattice crust, but I was short on time so just did a standard top crust (or “ceiling,” as a friend of mine calls it) and carved an “S” for strawberry into it for venting.

3.21.14 043

This pie was so good.  I brought it into work to share and it got rave reviews.  I highly recommend making it if you too are wanting to bring a little summer into your world right about now.  If you close your eyes while eating it you can almost feel warm sun on your face, I swear.

3.21.14 044

Strawberry Balsamic Pie (adapted slightly from “The Four & Twenty Blackbirds Pie Book” by Emily Elsen & Melissa Elsen)

  • All- Butter Crust for a 9-inch double-crust pie (see recipe below)
  • 1/4 cup plus 3 tablespoons granulated sugar
  • 2 pounds fresh strawberries, rinsed and quartered (5 to 6 cups) NOTE: I used frozen strawberries and it turned out just fine
  • 1 small baking apple (such as Norther Spy or Golden Delicious)
  • 2 tablespoons balsamic vinegar
  • 2 dashes Angostura bitters
  • 3/4 cup packed light brown sugar
  • 3 tablespoons ground arrowroot
  • 2 grinds fresh black pepper, fine setting
  • 1/2 teaspoon kosher salt

Have ready and refrigerated one pastry-lined 9-inch pie pan and pastry round or lattice to top.

Sprinkle 3 tablespoons of the granulated sugar over the strawberries.  Stir gently to combine and allow the fruit to macerate at room temperature for 30 minutes to 1 hour.

Peel the apple and shred on the large holes of a box grater.  Drain the strawberries of excess liquid and combine with the shredded apple.  Sprinkle on the balsamic vinegar and Angostura bitters.

In a separate bowl, mix together the remaining 1/4 cup granulated sugar, brown sugar, arrowroot, black pepper, and salt.  Gently fold the sugar mixture into the strawberry mixture.  Pour the filling into the refrigerated pie shell, arrange the lattice or pastry round on top, and crimp as desired.

Chill the pie in the refrigerator for 10 to 15 minutes to set the pastry.

Meanwhile, position the oven racks at the bottom and center positions, place a rimmed baking sheet on the bottom rack, and preheat the oven to 425 degrees F.

Place the pie on the rimmed baking sheet on the lowest rack of the oven.  Bake for 20 to 25 minutes, or until the pastry is set and beginning to brown.  Lower the oven temperature to 375 degrees F, move the pie to the center oven rack, and continue to bake until the pastry is a deep golden brown and the juices are bubbling throughout, 35 to 40 minutes longer.

Allow to cool completely on a wire rack, 2 to 3 hours.  Serve slightly warm or at room temperature.

The pie will keep refrigerated for 3 days or at rom temperature for 2 days.

All Butter Crust for Double Crust Pie (from “The Four & Twenty Blackbirds Pie Book” by Emily Elsen & Melissa Elsen)

  • 2 1/2 cups unbleached all-purpose flour
  • 1 teaspoon kosher salt
  • 1 tablespoon granulated sugar
  • 1/2 pound (2 sticks) cold unsalted butter, cut into 1/2-inch pieces
  • 1 cup cold water
  • 1/4 cup cider vinegar
  • 1 cup ice

Stir the flour, salt, and sugar together in a large bowl.  Add the butter pieces and coat with the flour mixture using a bench scraper or spatula.  With a pastry blender, cut the butter into the flour mixture, working quickly until mostly pea-sized pieces of butter remain (a few larger pieces are okay; be careful not to overblend.)

Combine the water, cider vinegar, and ice in a large measuring cup or small bowl.  Sprinkle 2 tablespoons of the ice water mixture over the flour mixture, and mix and cut it in with a bench scraper or spatula until it is fully incorporated.  Add more of the ice water mixture, 1 to 2 tablespoons at a time, using the bench scraper or your hands or both) to mix until the dough comes together in a ball, with some dry bits remaining.  Squeeze and pinch with your fingertips to bring all the dough together, sprinkling dry bits with more small drops of the ice water mixture, if necessary, to combine.  Divide the dough in half and shape the dough into flat discs, wrap in plastic, and refrigerate for at least 1 hour, preferably overnight, to give the crust time to mellow.

Wrapped tightly, the dough can be refrigerated for 3 days or frozen for 1 month.

fall is my favorite / apple cake

9.22.13 003

Do certain songs or albums remind you of a particular season or time of year?  For me, Ryan Adams “Love is Hell” always takes me back to one particularly cold January when I spent my evenings driving through neighborhoods in metro Detroit looking for “for rent” signs for a new apartment.  To this day when I hear a song off of that album I swear I can see my breath in the air and snow piled up on the streets.  The album that will always be fall to me is Carole King’s “Tapestry.”  It reminds me of being in the kitchen with my mom, listening to Tapestry with a chill in the air and the distinct smell of apples baking.  Last week I heard “I Feel the Earth Move” on the radio and I knew it was time to start some fall baking.

9.22.13 005

I’ve never made an apple cake before but I had clipped a recipe for one by the chef Marcus Samuelsson out of a magazine years ago and since I have an abundance of apples right now from a very prolific tree in my parents’ yard it felt like the right time to bust it out.

9.22.13 007

It’s a very simple recipe (which I love) and called for both chopped up apple to be mixed in with the batter and sliced apples to be placed on top of the cake decoratively.  The other ingredients were: half a stick of butter, half & half, flour, white and brown sugar, cinnamon, an egg, and baking powder.  All things I had readily on hand.

9.22.13 012

I did my best placing the apples in an attractive manner on top and since there was extra cinnamon and sugar juice from the apples I thought it might be a good idea to pour that on top of the sliced apples too.  Can’t hurt, right?

9.22.13 018

The resulting cake is so moist and delicious and versatile enough to be served as dessert or even for breakfast that it will for sure be added to my regular rotation of favorite recipes.  Happy Fall!

9.22.13 028

Marcus Samuelsson’s Apple Cake (slightly adapted)

  • 1/2 cup granulated sugar
  • 1/2 cup packed light brown sugar
  • 2 Granny Smith apples (I used 4 small Macs)
  • 1 teaspoon ground cinnamon
  • 4 tablespoons (1/2 stick) unsalted butter at room temperature, plus more for greasing the pan
  • 1 large egg
  • 1-1/4 cups unbleached all-purpose flour, plus more for flouring the pan
  • 2 teaspoons baking powder
  • 2/3 cup half-and-half
  • 2 teaspoons confectioners’ sugar

Preheat the oven to 350 degrees Fahrenheit. Butter a 9-inch springform pan and lightly flour.

Toss together the granulated sugar and brown sugar. Set aside.

Peel and core the apples, then slice one apple into 16 wedges. Combine the cinnamon and 1/3 cup of the sugar mixture in a medium bowl. Add the apple wedges and toss to coat. Roughly dice the remaining apple.

In the bowl of an electric mixer fitted with a paddle attachment, beat together the butter and the remaining sugar mixture on medium speed until light, fluffy, and lemon colored, about 2 minutes. Add the egg and mix until combined. Reduce the speed to low and add the flour and baking powder. Slowly add the half-and-half, and mix until combined. Fold the diced apple into the batter.

Pour the batter into the prepared pan and spread evenly. Arrange 14 of the apple wedges fanned along the outer edge of the pan and place the 2 remaining wedges in the center. Bake for 35 to 40 minutes, or until the center is golden brown.

Remove from the oven to a wire rack to cool completely. Run a small offset spatula around the edges to release the cake from the pan and remove the springform. Sprinkle with confectioners’ sugar, then cut into 12 wedges.

cookie dough ice cream

As you may have noticed I’ve been making a lot of ice cream lately, though surprisingly I hadn’t previously attempted making my favorite kind of ice cream so I decided it was high time I changed that.

6.30.13 001

I started by making a vanilla custard base by slicing open a vanilla bean and scraping the seeds into sugar and then rubbing them together to infuse the vanilla flavor into the sugar.

6.30.13 007

Then I stirred egg yolks into the vanilla-infused sugar while heating up whole milk and heavy cream over the stove to the point of steaming but not boiling.

6.30.13 008

Then I whisked the milk mixture with the egg mixture and returned them both to the stove and threw in the empty vanilla bean pod (why not!) to continue heating until it thickened.

6.30.13 014

Once the mixture thickened I strained it into a bowl inside a larger bowl filled with ice and cold water to help cool the custard down.

In the meantime I prepared the cookie dough for the most important part of the ice cream.

6.30.13 018

I had a little help.  My friend’s daughter Zakiya makes an excellent kitchen assistant.  (Don’t worry, I made her wash her hands like twenty times before rolling the dough balls.  [Or maybe I’m the only person whose first thought upon seeing a child holding food I may later consume is “I hope they washed their hands…])

6.30.13 021

She was so helpful and eager to learn that I for sure will be using her assistance again in the future.  And her cookie dough balls were perfectly round!  Mine were lumpy.  No comparison.

Allow me to digress for a minute here upon this amazing little creature of a person.  Below is baby Z, around a week old.  She was born right before I moved to New York.

baby z

Here she is not quite a year later, entertaining as always.

z toddler

Two and a half-ish.  She loved that whistle.  The girl knows her accessories…

toddler z 2

Four.  She was pretending to be a bee at Eastern Market.  Her idea, not mine.  I just asked her to stand in front of the pretty flowers and smile.

z as bee

She’ll be eight in a few weeks and I’m not sure where the time has gone.  Surely I haven’t aged any!  Okay, back to the ice cream…

6.30.13 020

After the custard has completely cooled and churned in an ice cream maker and after the cookie dough has chilled properly in the freezer you stir the two together.  The custard should be about the consistency of soft serve.  After they’ve been stirred together they need to be moved to a freezer-safe container and chilled for several hours more in the freezer before serving.

6.30.13 022

In a word, divine.  I wolfed it down in a couple of days which means I will never again make it unless I have guests to share it with.

Thanks to Z for her help and her mom Tracey for snapping some of the photos!

Cookie Dough Ice Cream (custard from “Humphry Slocombe Ice Cream Book” by Jake Goodby, Sean Vahey, and Paolo Lucchesi; cookie dough recipe from www.joythebaker.com)

Cookie Dough:

  • 1 stick (1/2 cup or 4 ounces) unsalted butter at room temperature
  • 1 cup plus 2 Tablespoons all-purpose flour
  • 1/2 teaspoon baking soda
  • 3/4 teaspoons salt
  • 1/2 cup brown sugar
  • 1/3 cup granulated sugar
  • 1 teaspoon vanilla extract
  • 1/3 cup Greek yogurt
  • 1 cup semi-sweet mini chocolate chips

In the bowl of a stand mixer fit with a paddle attachment cream butter and sugars until light and fluffy, about three minutes in the machine. Beat in yogurt along with the vanilla extract and stir to combine.

Whisk together the flour, baking soda and salt. Add all at once to the butter and sugar mixture and stir until incorporated. Fold in chocolate chips.

Using hands, roll bite-sized balls and then place on a waxed paper lined cookie sheet. Place in the freezer overnight or until frozen, at least three hours.

Custard:

  • 2 cups heavy cream
  • 1 cup whole milk
  • 2 teaspoons salt
  • 1 vanilla bean
  • 1 cup sugar
  • 3 egg yolks
  • 1 teaspoon vanilla extract

Fill a large bowl or pan with ice and water.  Place a large, clean bowl in the ice bath and fit the bowl with a fine-mesh strainer.

In a large, heavy-bottomed, nonreactive saucepan over medium heat, combine the cream, milk, and salt and cook, stirring occasionally, until hot but not boiling.

Meanwhile, split the vanilla bean lengthwise.  Using the tip of a small, sharp knife, scrape out the insides into a medium bowl.  Add the sugar and rub it all together with your fingers to incorporate and evenly distribute the vanilla seeds.  Get all the last bits from the bean (save the pod.)  Whisk in the egg yolks and vanilla extract.

Remove the cream mixture from the heat.  Slowly pour about half of the hot cream mixture into the yolk mixture, whisking constantly.  Transfer the yolk mixture back to the saucepan with the remaining cream mixture and return it to medium heat.  Cook, stirring constantly with a rubber spatula and being sure to scrape the bottom of the saucepan so it doesn’t scorch, until the liquid begins to steam and you can feel the spatula scrape against the bottom of the pan, 2 to 3 minutes.

Remove the custard from the heat and immediately pour it through the strainer into the clean bowl you set up in the ice bath.  Tuck the vanilla bean pod back into the custard.  Let cool completely, stirring occasionally.

When the custard has totally cooled, cover the bowl and let steep and chill in the refrigerator for at least 1 hour.  When you are ready to freeze the custard, remove the vanilla bean, transfer the custard to an ice cream maker, and spin according to the manufacturer’s instructions.  When custard looks to the texture of soft serve, remove from freezer bowl and stir in cookie dough balls.  Eat immediately, or transfer to an airtight container, cover, and freeze for up to 1 week.

strawberry tartlets

Sadly, strawberry season is over in these parts, though fortunately I picked enough strawberries a few weekends ago that I will have plenty to bake with in the coming months.  Thank goodness for freezers!

strawberries

Months ago I purchase some adorable little tartlet pans but had not yet used them for anything so I decided to amend the situation this past weekend.  I also have been meaning to experiment more with gluten-free baking since it intrigues me and I have many gluten-free flours in my pantry, so when I found a pate sucre (sweet crust) recipe from my La Tartine Gourmande cookbook I was inspired to marry it with some freshly picked strawberries in said tartlet pans.

6.30.13 073

 The recipe called for sweet white rice flour which I have plenty of but also quinoa flour which I did not have.  I found it in a local health food store but it was crazy expensive but since I always have actual quinoa in my pantry I decided to go DIY and grind it into flour myself.  Many websites advised toasting the quinoa before grinding it into flour I ignored that and just ground it down using my coffee grinder.  I was a bit nervous how it would turn out because quinoa can sometimes be a little bitter but in this particular recipe there was enough else going on (namely confectioners’ sugar) that it turned out fine.  Next time I may try to toast the quinoa before grinding, however, and I will let you know if it’s worth it or not.

6.30.13 078

This dough had to be refrigerated for a few hours and then brought to room temperature before being rolled out.  Upon rolling the dough out I used a biscuit cutter to get it into shapes that fit neatly into the tartlet pans but neatness is definitely not required here.  You could pat the dough into the pans in any manner you choose and it will still turn out fine, I was just being fancy.  I pre-baked the tartlet crusts so put parchment paper into each tartlet pan and then weighted that with dried beans.  Apparently you can buy pie weights but I don’t see the point since dried beans or rice work just as well and I always have them on hand.  (Save them and use them as intended, just let them cool after their stint as pie weights and put them back with the rest of the beans or rice.)

6.30.13 080

I did research for the strawberry filling but wound up shooting from the hip since a lot of what I was finding seemed more complicated than it needed to be.  I wanted to keep it simple with strawberries as the main star.  The one (simple but) slightly fancy thing I did was to use the seeds from half of a vanilla bean pod to scent/flavor the sugar I used to macerate the strawberries.  It’s so easy to do but makes the dish more luxurious.

6.30.13 069

Sprinkle the vanilla-infused sugar on top of sliced strawberries and let the berries macerate for about an hour.

6.30.13 083

Then pour the berries into the pre-baked tartlet shells and bake for about 10 to 15 minutes more in the oven to let the strawberries roast a little bit.

6.30.13 084

The tartlets are best served warm from the oven, and if you wanted to serve them with a little ice cream, whipped cream, or even a dollop of mascarpone cheese I would say that you and I should be friends.

6.30.13 097

Strawberry Tartlets

Pate Sucre (Sweet Crust) (from “La Tartine Gourmande: Recipes for an Inspired Life” by Beatrice Peltre)

  • ½ cup white rice flour
  • 1/3 cup quinoa flour
  • 1/3 cup cornstarch
  • 1 ½ teaspoons xanthan gum
  • 1/3 cup confectioners’ sugar
  • 7 tablespoons unsalted butter, chilled and diced
  • 1 small egg

In the bowl of a stand mixer fitted with the paddle blade, combine the flours, cornstarch, xanthan gum, and confectioners’ sugar.  Work on medium speed to obtain a fine mixture.  Add the butter and work again until crumbles form.  Add the egg and work until the dough detaches from the bowl and forms a ball.  Wrap in plastic wrap and refrigerate for a minimum of 3 hours.  Bring to room temperature before using (about 30 minutes, when the crust doesn’t feel hard).

Using gluten-free dough, generously dust work surface and rolling pin.  Roll out room-temperature dough to circle slightly larger than 10-inch tart pan.  If you are using tartlet pans as I did, the shape of the rolled-out dough doesn’t matter so much as you will be fitting it into smaller pans.  I used a floured biscuit cutter to portion out dough for the tartlet pans but use whatever method you feel is best.

Preheat oven to 350 degrees F.  Once you have rolled out the dough and pressed it into the tart mold(s), cover it with a piece of parchment paper, and top it with pie weights (dry rice or beans work too).  Bake the crust for 10 or 15 minutes, until light brown.

Strawberry Filling:

  • 3 cups washed, hulled, and sliced strawberries
  • 3 tablespoons sugar
  • ½ vanilla bean pod

Slice vanilla bean pod in half and set half away for use at a later time.  Scrape the seeds out of the half you are using into a small bowl.  Pour sugar into the same bowl and use clean fingers to rub the vanilla seeds into the sugar.

Place sliced strawberries into medium-sized bowl.  Sprinkle vanilla sugar mixture over the top and let berries macerate for about an hour.

After berries have macerated, pour into pre-baked tart shells and bake for an additional 10 to 15 minutes in preheated 350 degree F oven.  Enjoy tartlets warm with a dollop of ice cream, whip cream, or mascarpone cheese.